Dictionary
View and manage all warehouse data, events, fields, and catalog items—add descriptions, apply tags, create managed views, and organize your analytics data for easy discovery across reports.
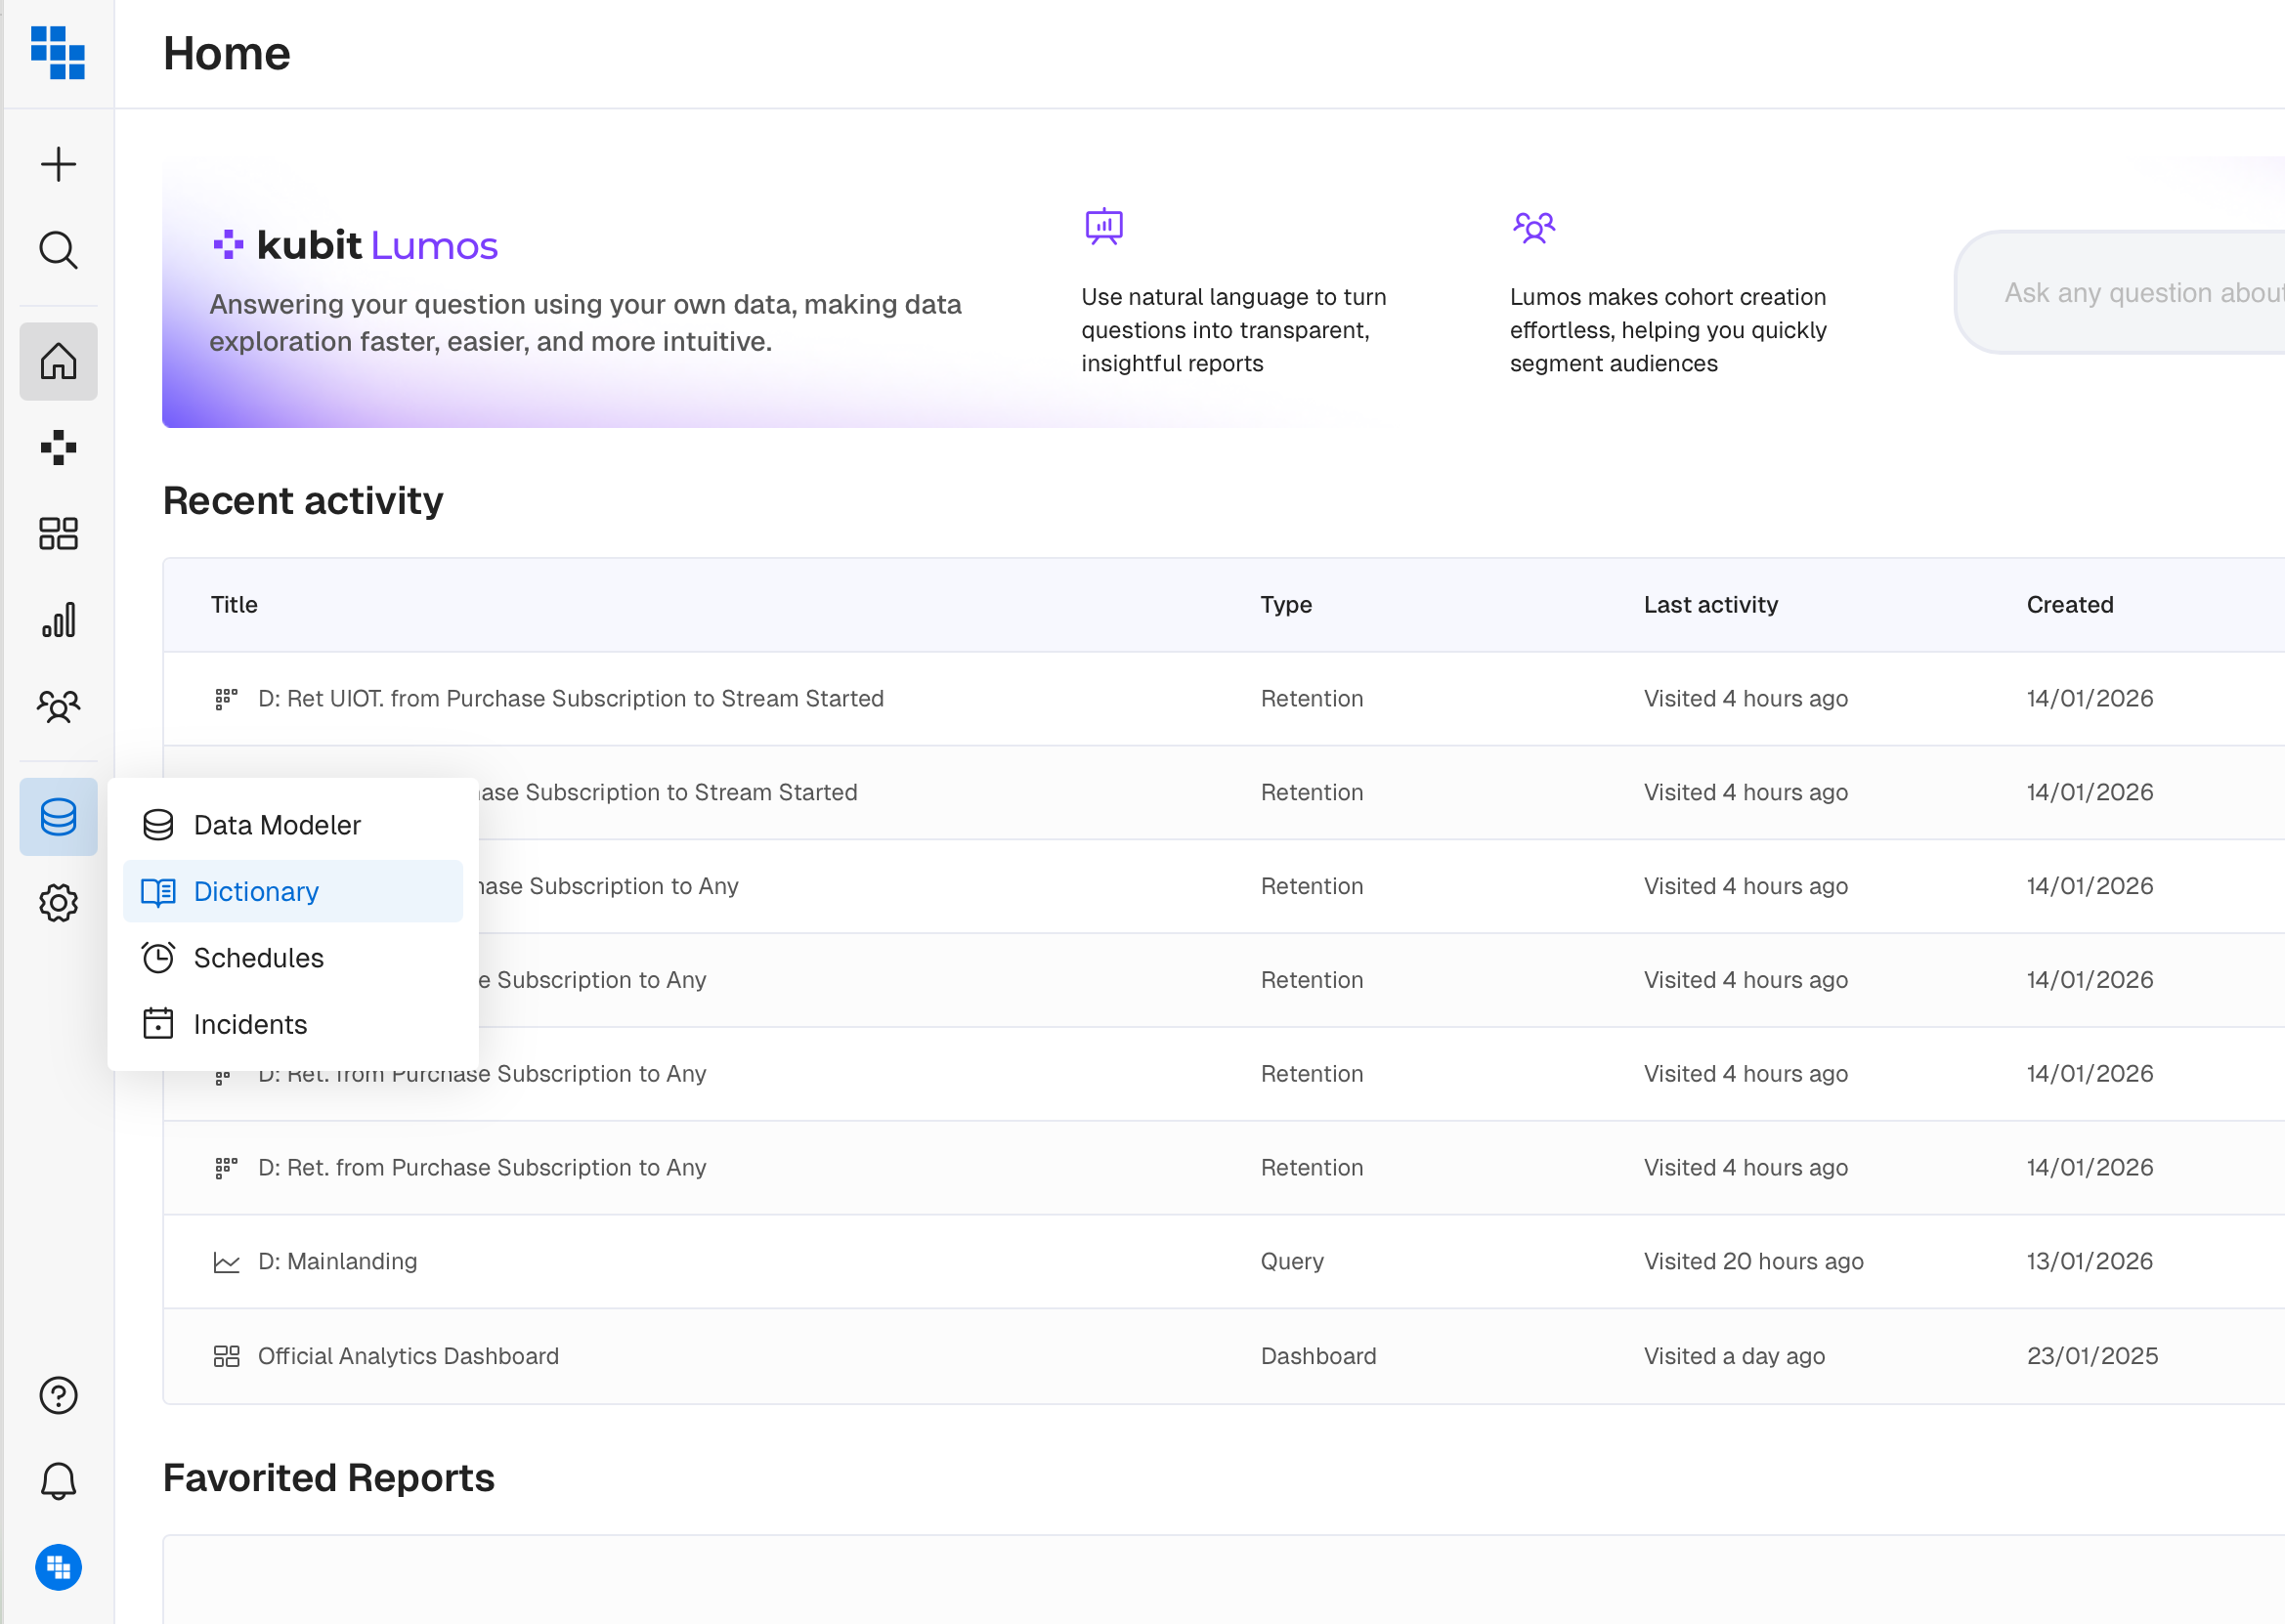
What is Dictionary?
In Kubit, you can analyze data shared from your warehouse, and the Dictionary is where you can view all available data.
In the Dictionary, you can manage:
- Warehouse Data: Directly from your warehouse tables, including all Events and corresponding Fields shared with Kubit.
- Catalog: Saved items like Virtual Events, Saved Filters, Saved Measures, and Binning.
Items in the Dictionary are organized by Schemas within Kubit. A Schema is a collection of data you can analyze together, similar to projects within your warehouse.
Quick Access Dictionary
The Quick Access Dictionary is a workflow feature that organizes your data within the report builder. Click the 📚 icon to open it. This feature reduces the need to switch between screens. You can search for items using keywords in their name or description. Start typing in the search box, and items will be filtered accordingly.
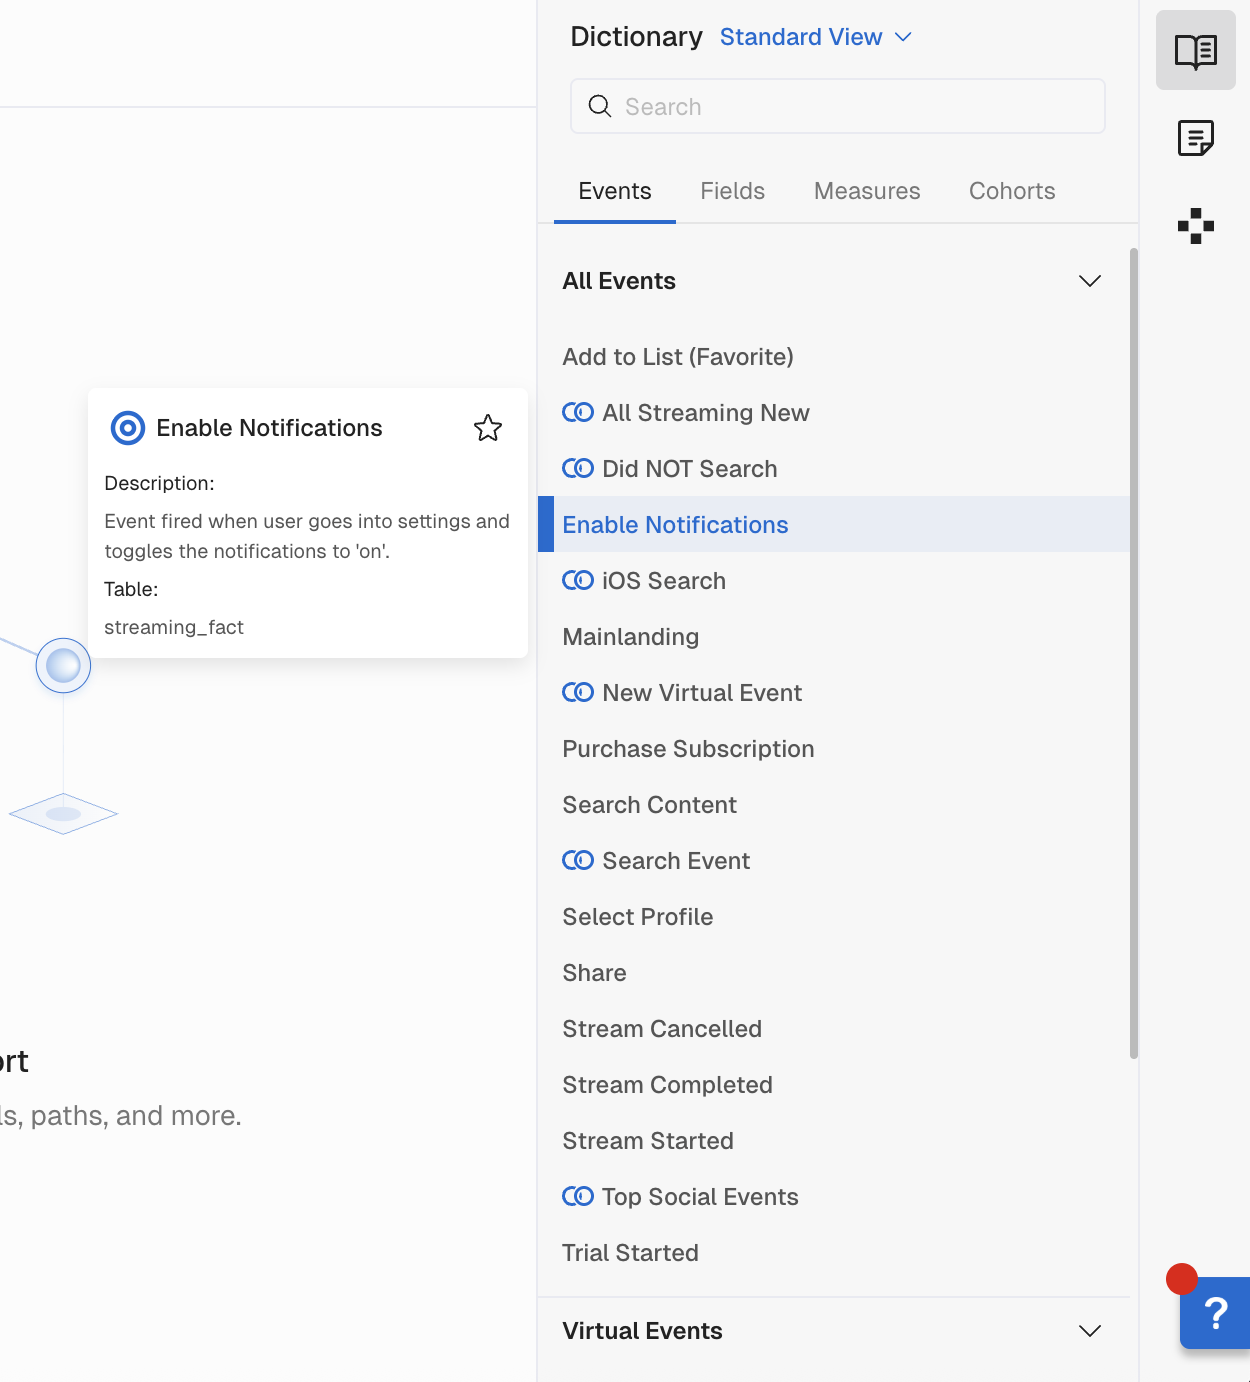
Event and Field Descriptions
You can modify Event, Field, Measure, Virtual Event and Saved Filter descriptions directly in the Dictionary UI. Click the Description field to update the information.
Updating Event and Field Descriptions in Kubit
Kubit allows manual entry of this information via our UI. You can also sync these values from your cloud data warehouse by contacting your Customer Success Manager to set this up.
-
From the side navigation select Dictionary.
-
Select the Schema for the Events/Fields you want to update.
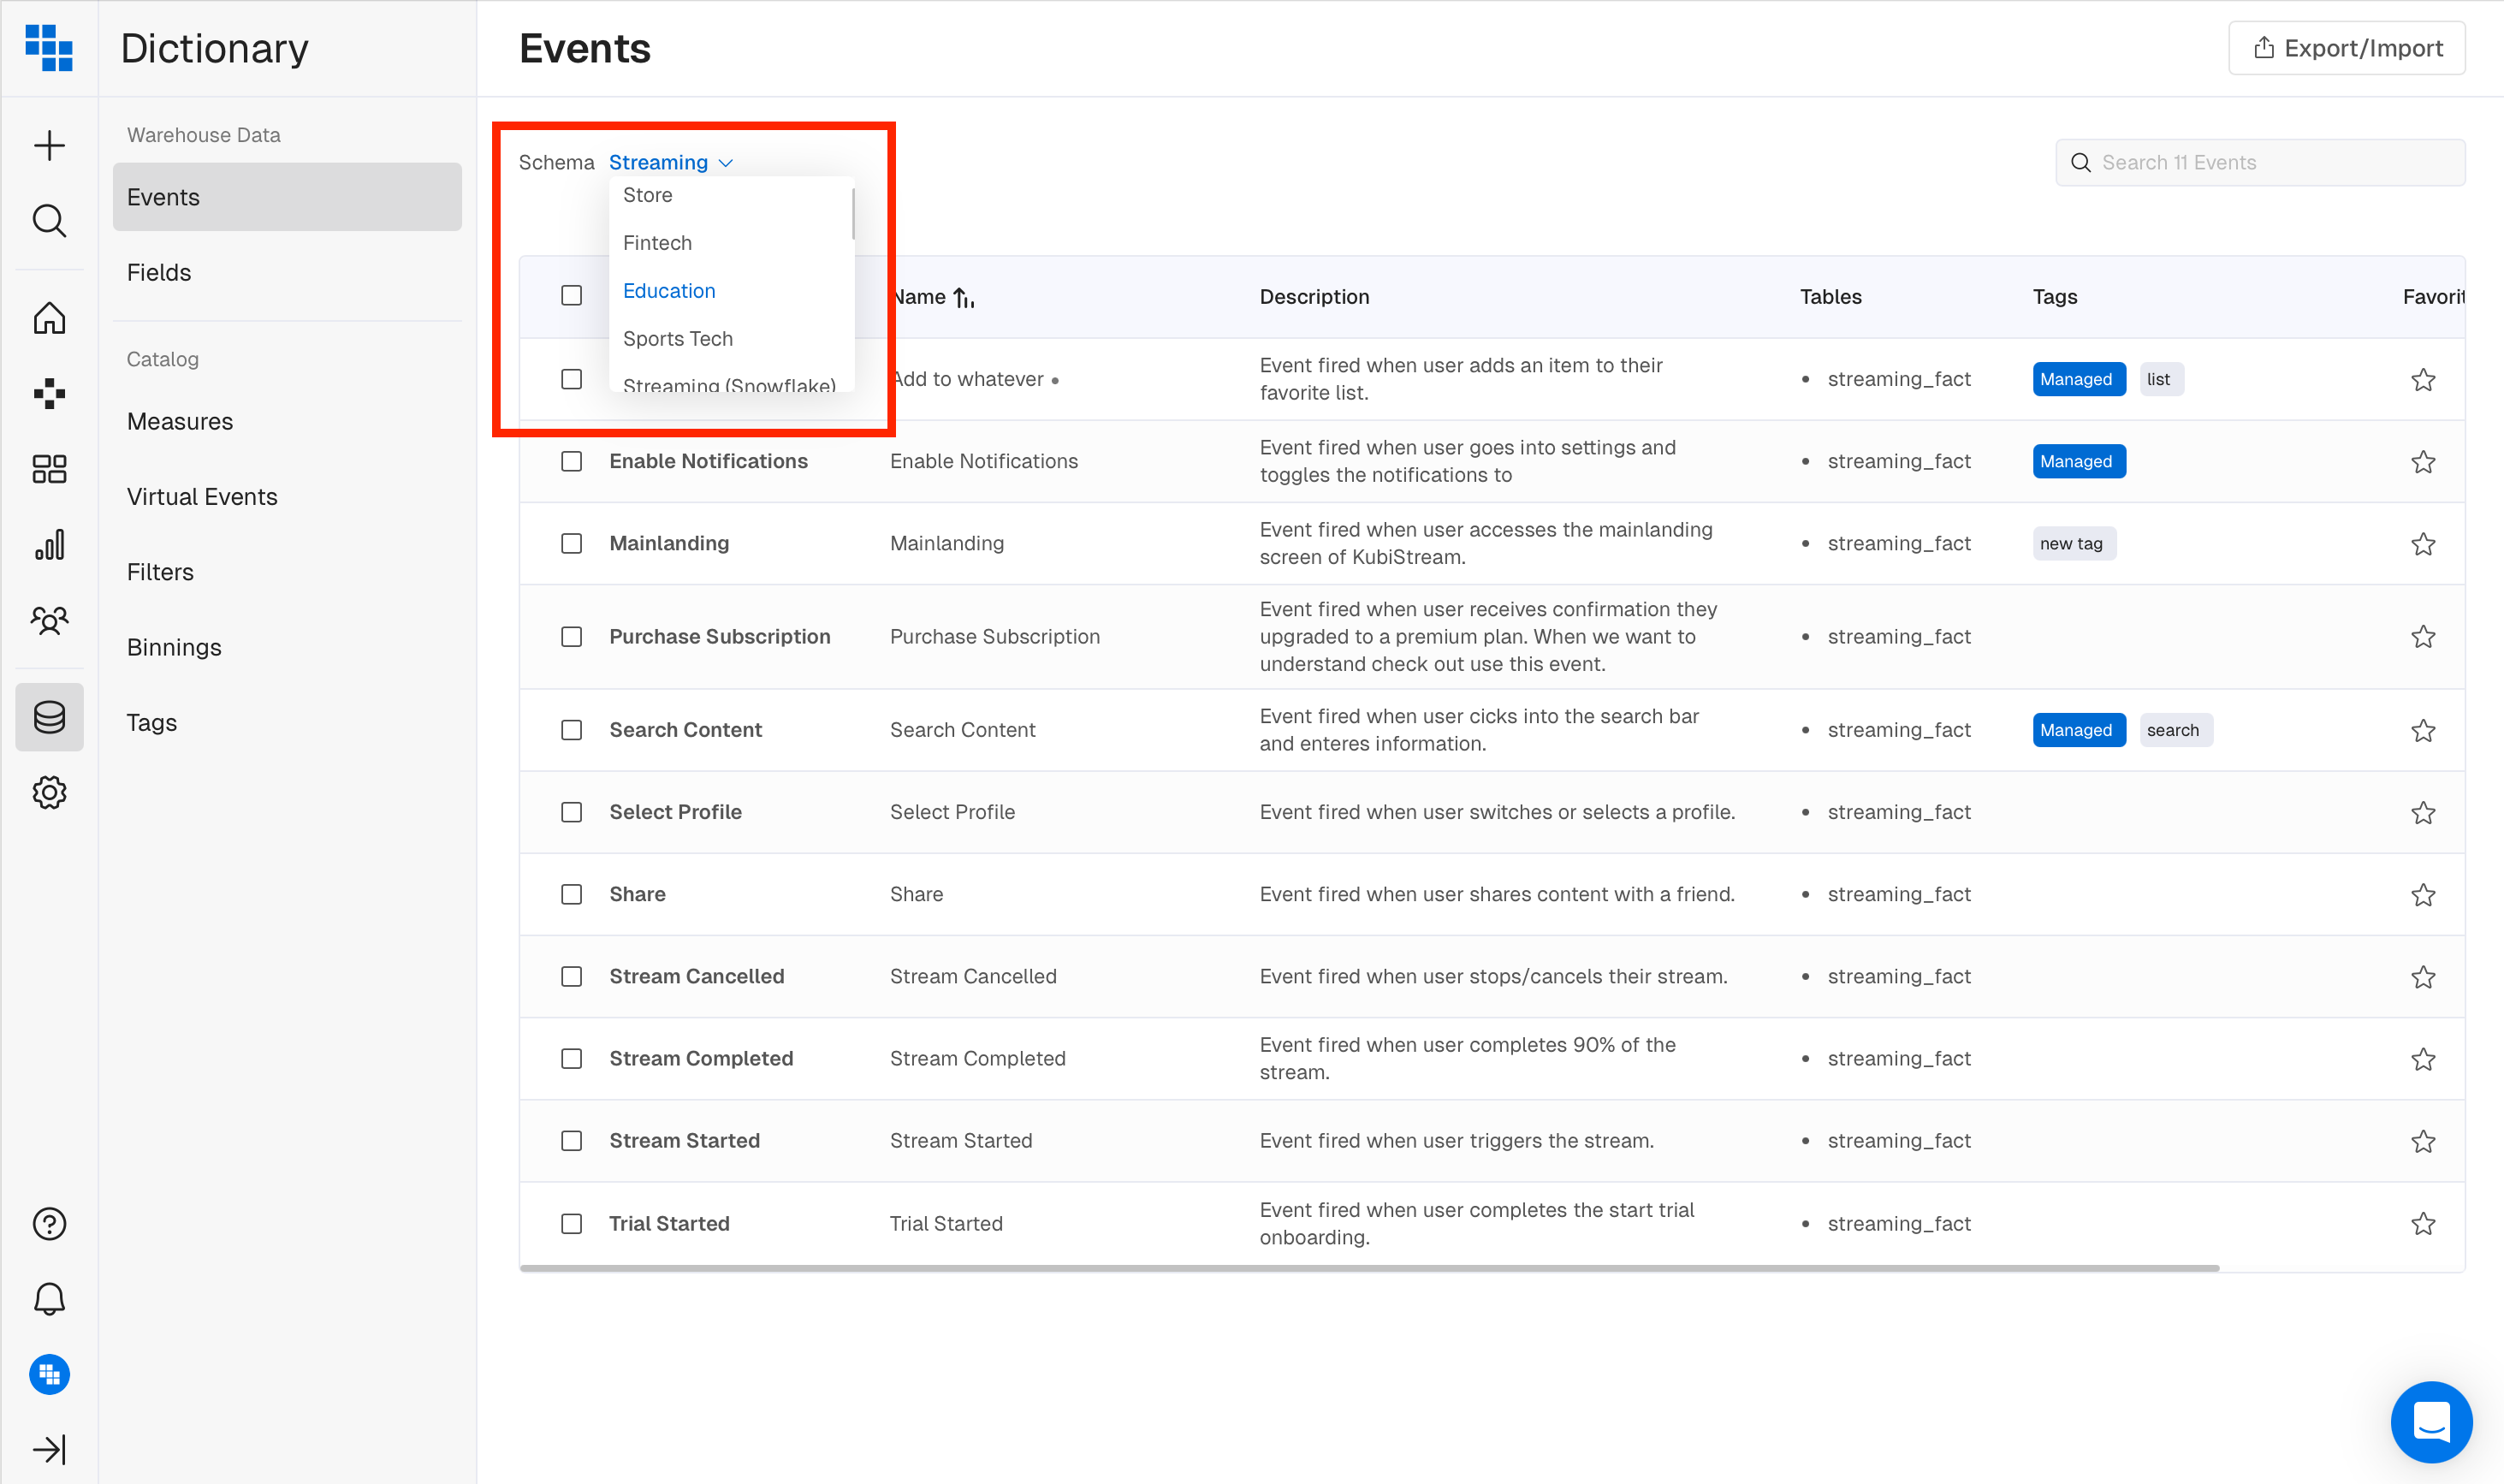
-
Find the entity you want to update by scrolling through the list or using the Search in the upper right corner.
-
Click into the Description column for the event you want to update and enter your description.
-
Continue updating as needed.
Updating Event and Field Descriptions through CDW
To manage descriptions from your Cloud Data Warehouse (CDW) contact your Customer Success Manager for setup assistance. Kubit will use a mapping table to populate Event descriptions directly from your Cloud Data Warehouse and it will use the column metadata from INFORMATION_SCHEMA to collect the Field descriptions.
If you've allowed Event or Field descriptions to be updated via your Cloud Data Warehouse, you will not be able to manually update them in the Kubit UI to preserve the source of truth.
Sample schema for a mapping table for the Event descriptions:
| Table | Event/Field Column | Tag Column |
|---|---|---|
| EVENT_DESCRIPTIONS | event_name (VARCHAR) | description (VARCHAR) |
See Descriptions in the Report Builder
Newly added descriptions appear in the Report Builder when you hover over items, adding context and confidence for end users.
Edit permission required to Rename
To modify descriptions, you must haveEditpermissions on the object. Without permission, you cannot make changes.
Rename Events in Dictionary
You can rename events directly from the Dictionary. Fields cannot be renamed as their mapping is integral to Kubit's functionality.
If syncing Event descriptions from your Cloud Data Warehouse, you cannot update Event names in Dictionary to preserve the source of truth.
Click the Name of the Event you want to change and type in the new text.
Sequence of actions
After renaming, remove the old named item from your report and re-add the renamed one before executing.
Rename Virtual Events, Measures, and Filters in Dictionary
You can rename virtual events, measures, or filters directly from the Dictionary. Fields cannot be renamed as their mapping is integral to Kubit's functionality.
Click on the Name of the item you want to change and type in the new name.
Sequence of actions to follow
After renaming, remove the old named item from your report and re-add the renamed one before executing.
Tags
You can categorize your data by adding tags directly from the Kubit UI. Tags help group items into similar categories, like hashtags on social media.
Tag permission required
Only users with Tag permissions can create or modify Tags. Admin and Governor roles have this permission.
Create a Tag
- Navigate to Dictionary > Item you want to Tag.
- Click into the Tag column of the Item you want to add a Tag to.
- Type in the name of the Tag you want to create.
- Click Create New Tag.
- If a Tag with that name already exists, click the existing Tag.
- Click Apply Tags.
Bulk Edit
You can bulk edit by selecting items to tag and then selecting Add Tags at the top of the list.
Add and Remove a Tag
- Navigate to Dictionary > Item.
- Click into the Tag column of the Item you want to add or remove a Tag on.
- Select the Tag you want to apply and click Apply Tag.
- To remove, deselect the Tag from the pop-up menu and click Apply Tag.
Bulk Edit
You can bulk edit by selecting items to tag and then selecting Add Tags at the top of the list.

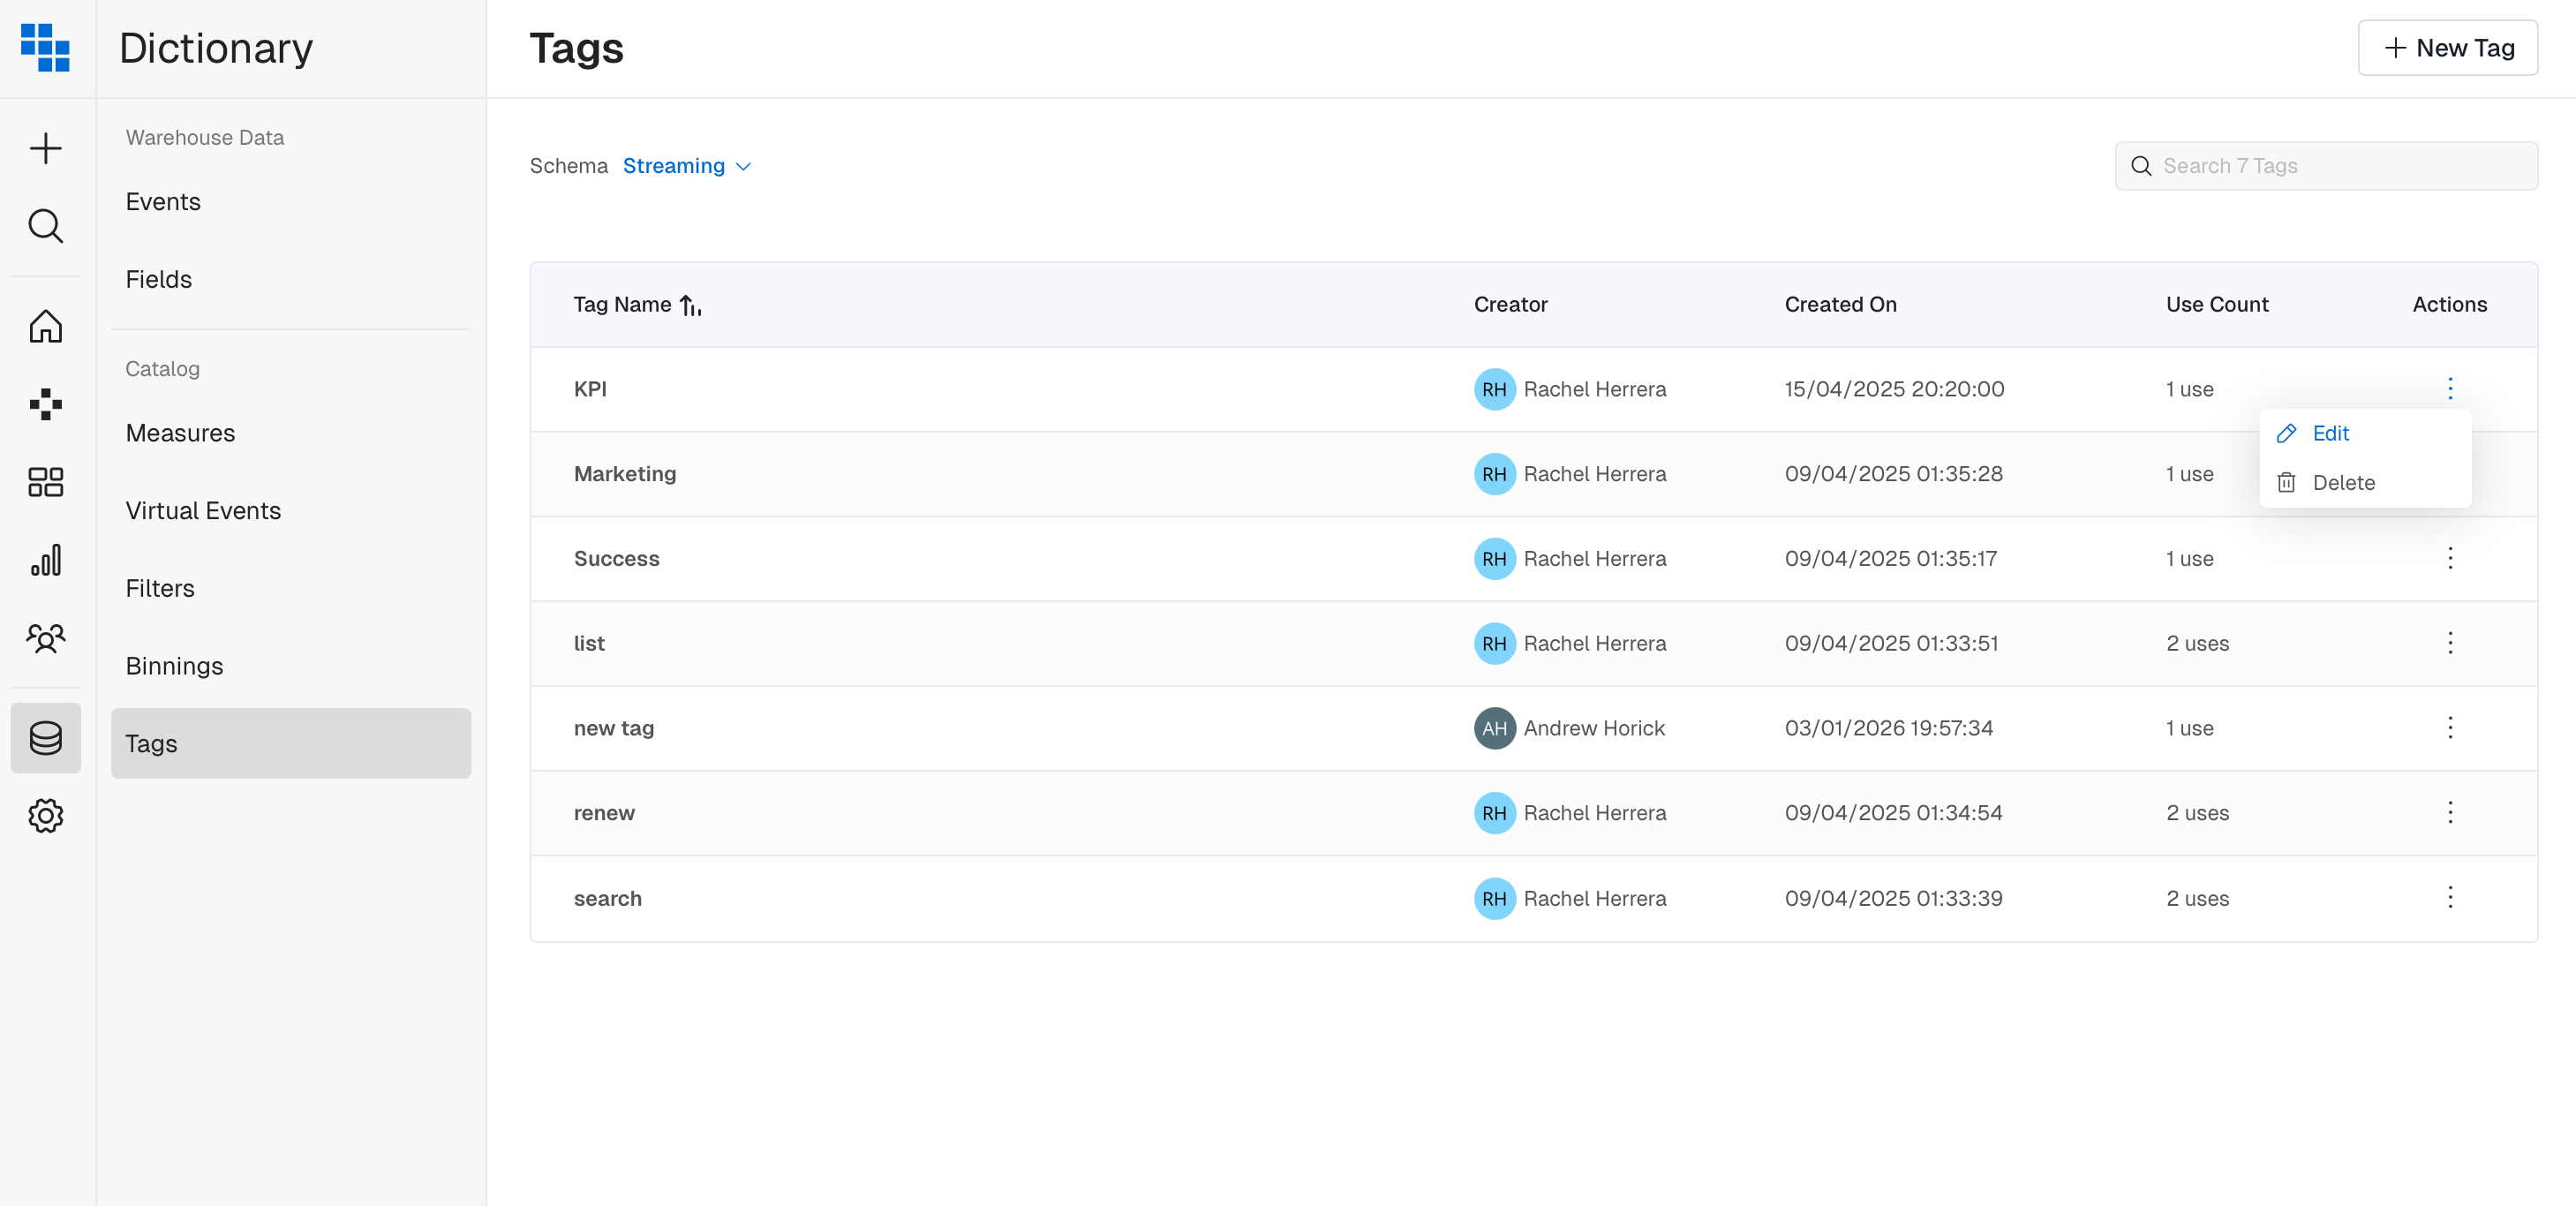
Edit/Delete Tags
- Navigate to Dictionary > Tags.
- Edit/Delete individual Tags from the context menu.
Where Do I See Tags in Kubit?
Once applied, Tags group Events, Fields, Measures, etc., in the selection widget, helping users see data grouped into logical tags.
Load Tags from a Mapping Table
To manage tags outside of Kubit, we can load Event and Field tags from a table. Contact support for setup assistance. We need:
- Table name(s)
- Read access to table(s)
- Column for event or field name
- Column for tag
For example:
| Table | Event/Field Column | Tag Column |
|---|---|---|
| KUBIT.TAGS_FOR_EVENTS | event_name (VARCHAR) | tag (VARCHAR) |
| KUBIT.TAGS_FOR_FIELDS | field_name (VARCHAR) | tag (VARCHAR) |
NoteThe tables should contain one tag per row.
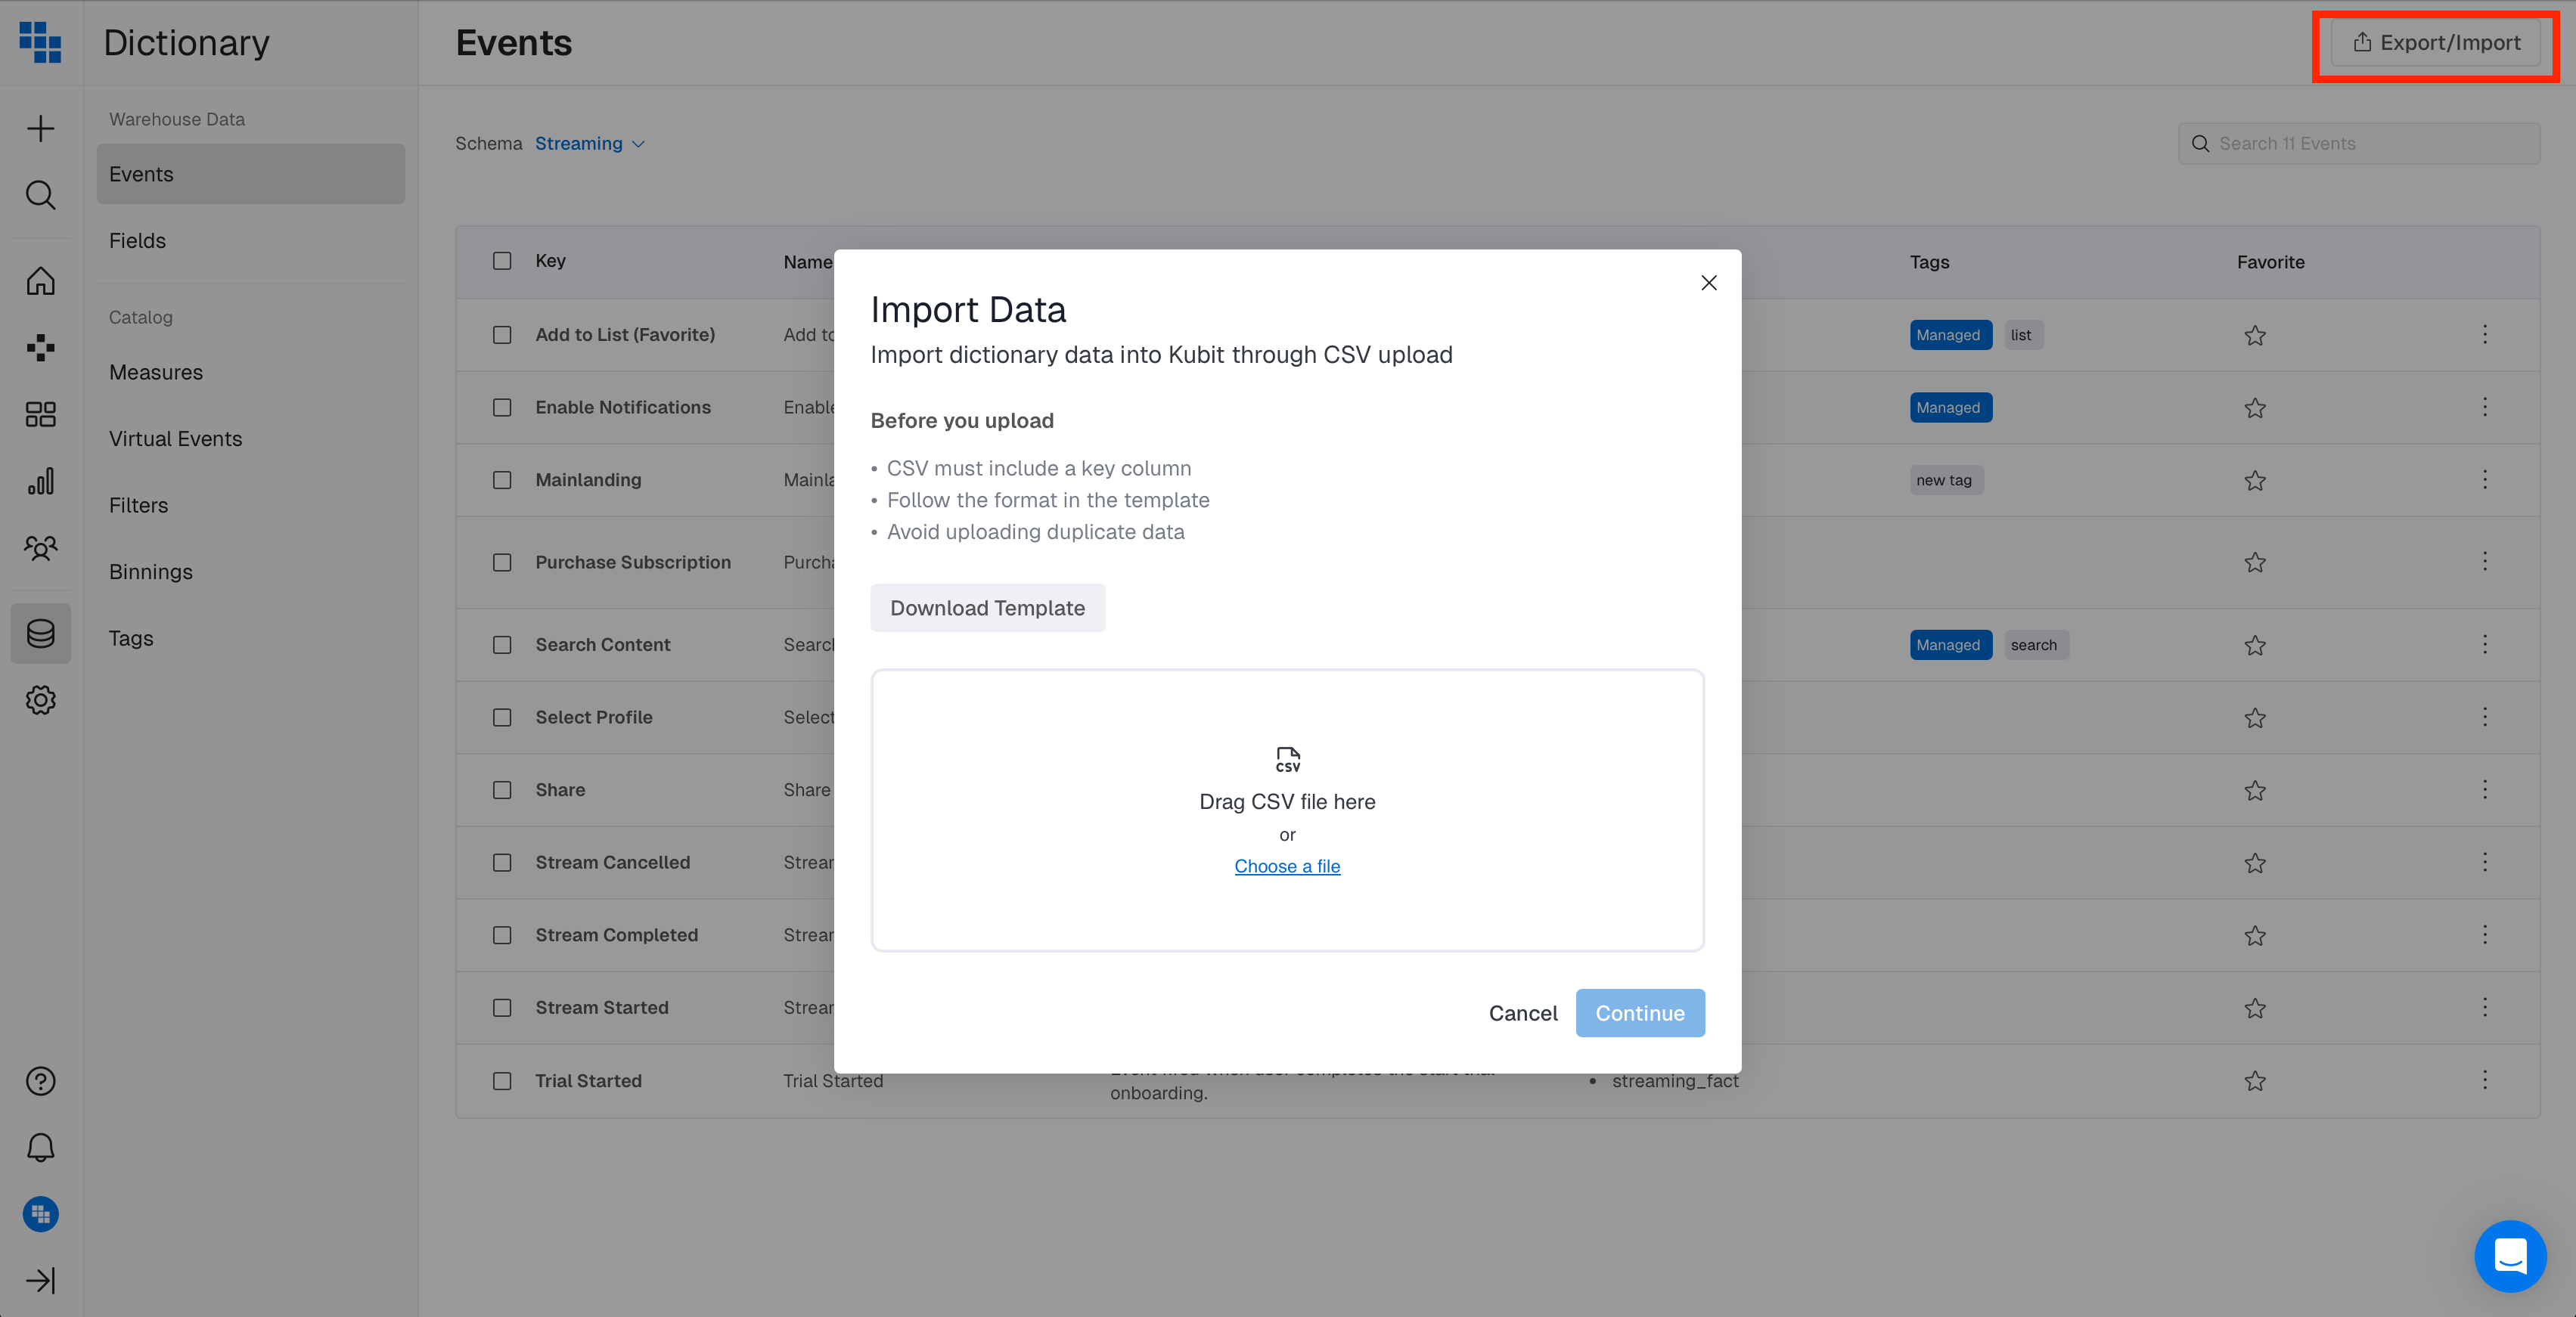
Dictionary Import/Export
On all Dictionary sub-pages you will see either an Export/Import or just Export button in the top right corner. This is useful for managing Descriptions in Kubit or moving them to your warehouse or just exporting lists of Events and Fields. Tags are exported as comma-separated lists.
Build a Managed View
Managed Views streamline user experience by allowing new users to see only tagged data. To add to your Managed View, tag it with the provided "* Managed" tag. Open the Quick Access Dictionary while building a report, click the dropdown, and select Managed View.
Searching
Items are searchable by name or description. Start typing in the text box, and items will be filtered accordingly.
Updated 5 months ago