Virtual Events
Combine multiple events or apply custom filters to create reusable virtual events, save complex event logic for consistent analysis, and streamline reporting across your organization.
Virtual Events
Often events are enough, but if an event filtered by specific fields or a combination of multiple events means another event you can create those in Kubit via Virtual Events.
Enable permissions to delete a Virtual EventYou must have permissions enabled for all Virtual Event functionality. Check your permissions in Personal Settings. If you're unable to do any of these actions, request these permissions via your Kubit Admin.
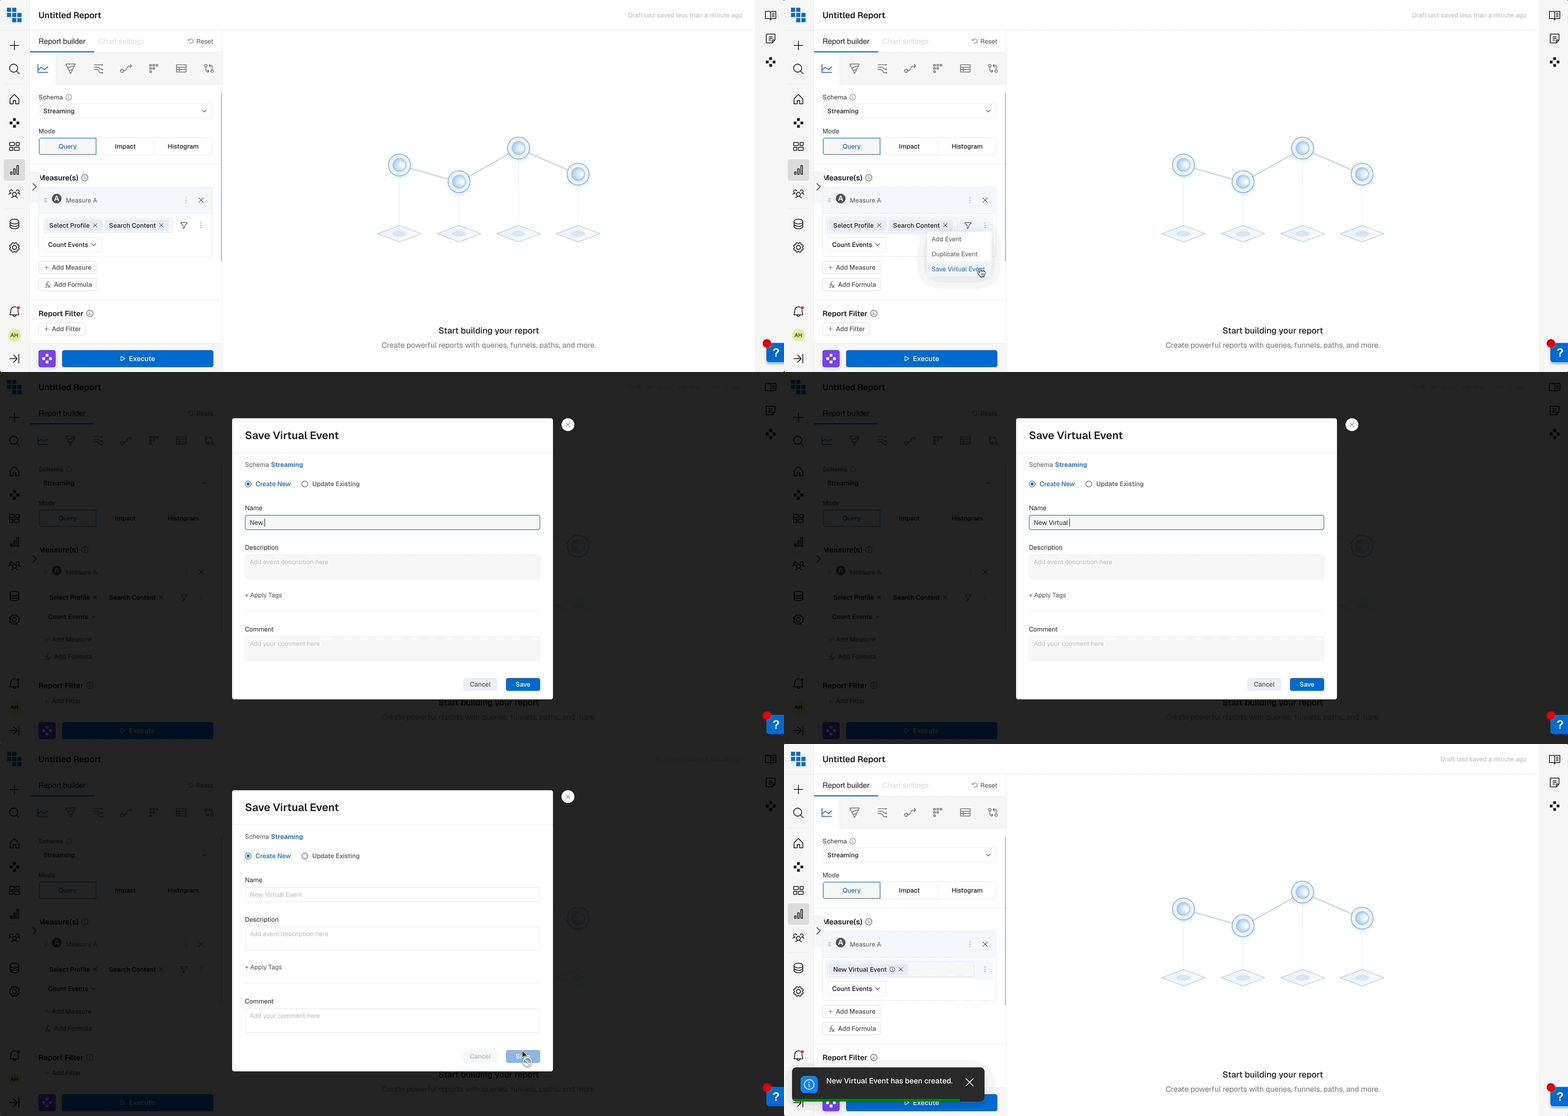
How to Create Virtual Events
- Build the new event you want to reuse by creating it inside any Kubit Report.
- Be sure to include any applicable filters in your definition.
- Adding multiple events within a Virtual Event behaves like an "OR" operator.
- Click the vertical three dots that appear to the right of the event block and select "Save Virtual Event".
- Once the save modal appears add a meaningful name, description, and any Tags you'd like to associate with this new Virtual Event.
- Click Save and now it's available as an event you can select in your event list dropdown or quick access dictionary.

Virtual Event filtersVirtual events don't actually allow additional filters once you've created them. So, please be sure to include all required filters before you save them.
Limitation of use of aggregation for Virtual EventsYou will not be able to create a Virtual Event in Query and use an aggregation Measure By function. These include
sum,avg,min,max, etc.
How to Edit Virtual Events
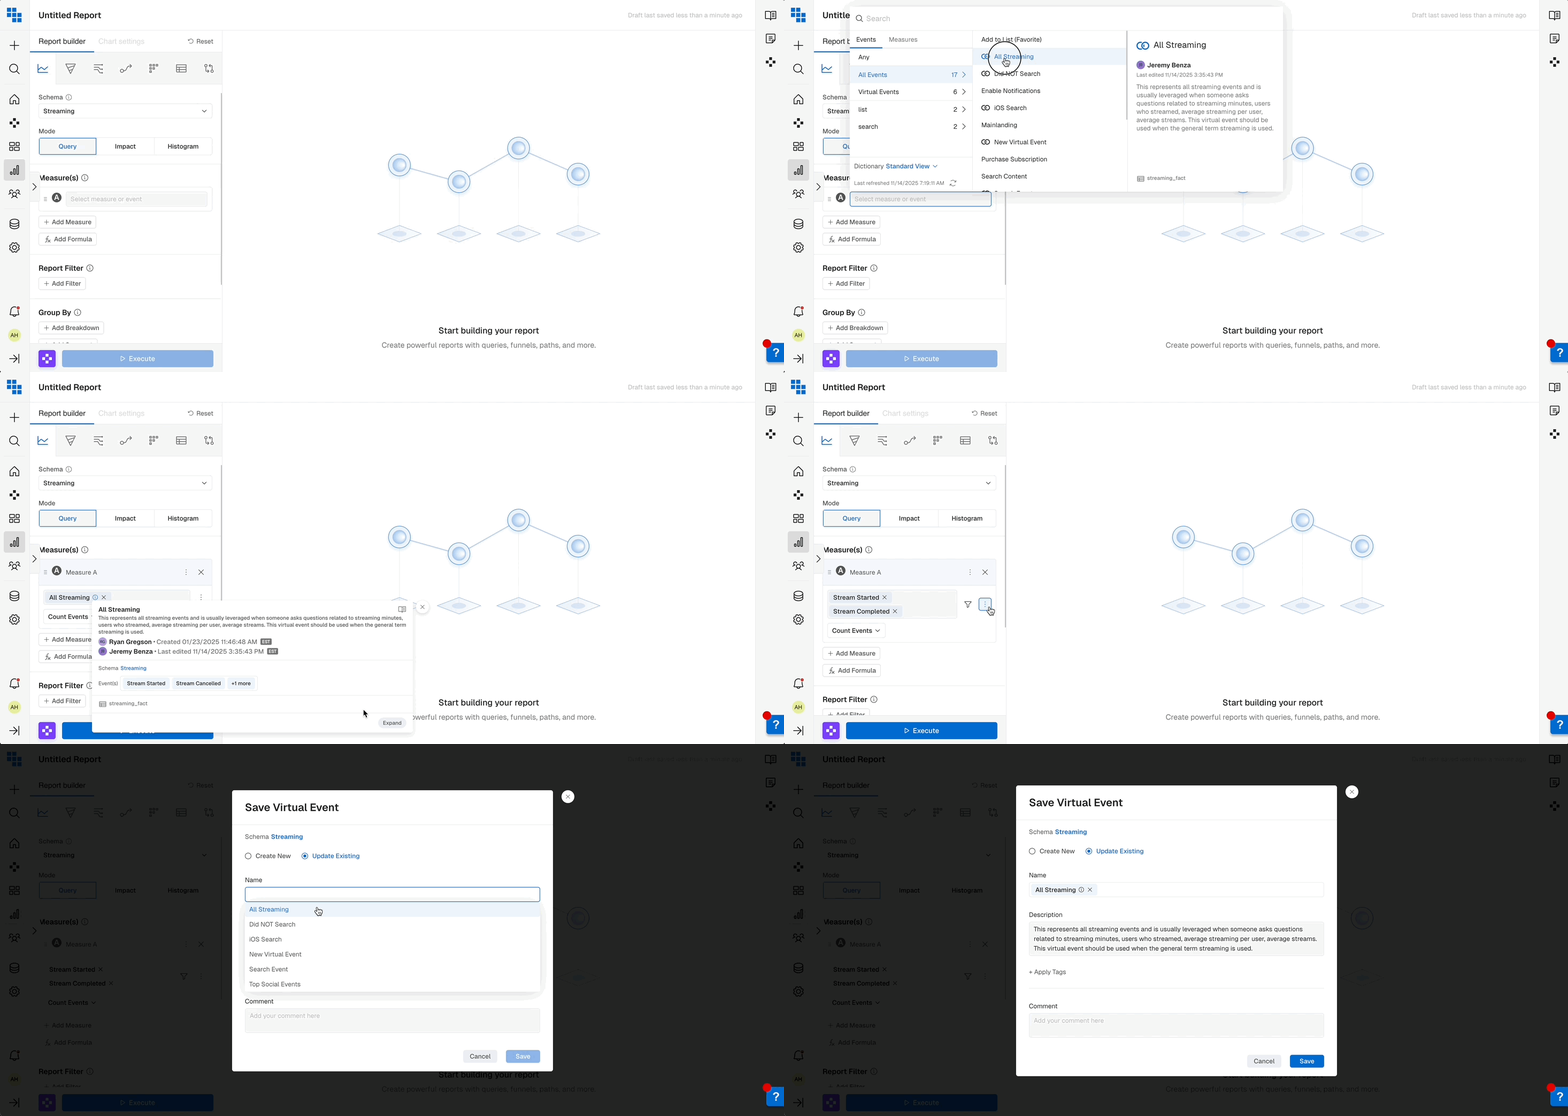
Once a Virtual Event has been created you may find that new logic or conditions should be applied to it. Modifying a Virtual event follows a similar path as creating one.
- Add a Virtual Event to your report and click the "i" icon once it's been added.
- Once the Virtual Event "i" icon has been clicked select the "Expand" option in the lower right corner.
- Once you've expanded the Virtual Event you should see all parts of it populate the report builder. Now you're able to make any adjustments you need.
- After all changes have been made click the vertical three dots that appear to the right of the event block and select "Save Virtual Event".
- Once the save modal appears click the "Update Existing" radial button.
- Select the Virtual Event you want to edit from the "Name" section dropdown list.
- Click Save and now it's updated with your new logic!

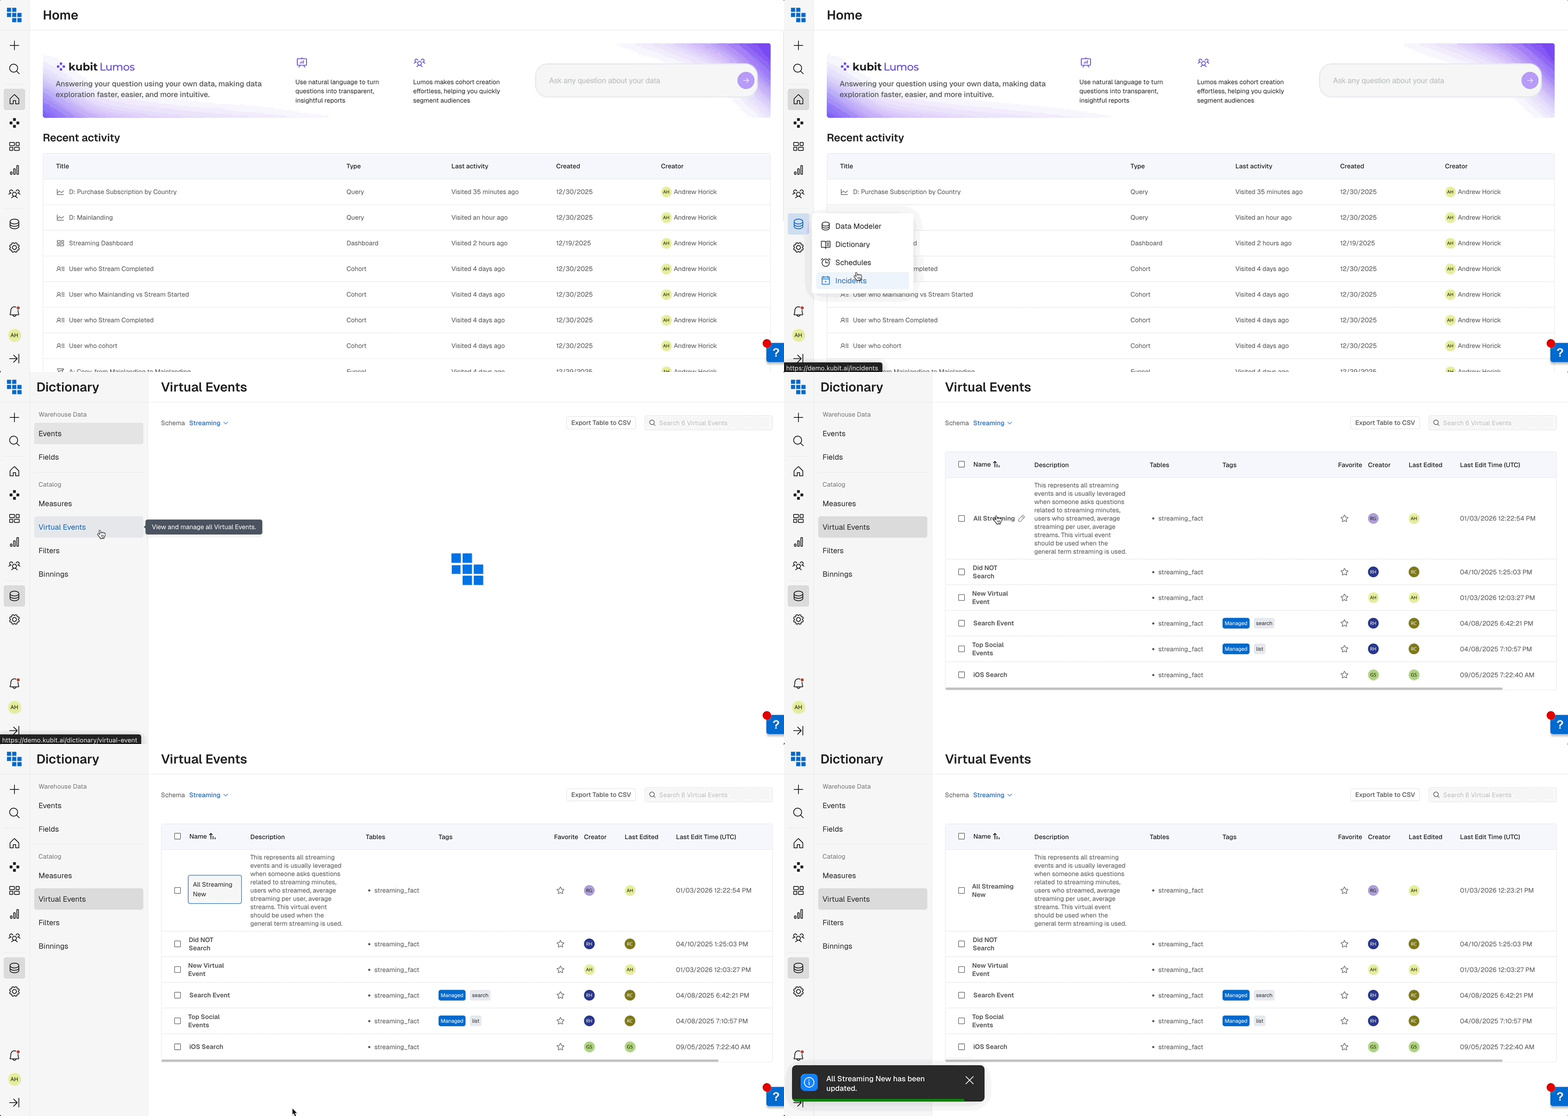
How to Rename Virtual Events
Any Virtual Event can be renamed from the Dictionary section of Kubit. Navigate to the Dictionary section from the database icon in the upper right-hand navigation.
Locate the Virtual Event section within Dictionary and click the name of the Virtual Event to rename it.

Updated 24 days ago