Groups
Create and manage user groups to assign role-based permissions at scale, sync with SSO LDAP groups, and organize teams by department or responsibility for streamlined access control.
Groups Page
To manage Users first find the Settings page in left navigation bar by clicking on the ⚙️ icon and then select Users.

Within Groups you can assign Roles based on your business structure, team responsibilities or various departments leveraging Kubit.
Groups allow for scaled permission assignment.
These Groups can be created either in Kubit or from an SSO LDAP group. To learn more about passing the groups from your SSO provider check out our Single Sign-On (SSO) and look for the optional Group(s) Atrribute under the Attributes Mapping section of individual provider guides.
Create Groups
If you decide to create Groups in Kubit simply:
- Click
Create Groupat the top right corner and provision your new group as needed. - Add an Assigned Role to the group. These permissions will be set for all users assigned to that Group.
- Organize Users into
Groupsvia the Userspage
Edit Groups
On the Groups page:
- Select
View Groupfrom the context menu of the Group you want to edit - Click on
Edit Group Permissions( ✎ icon) - Modify the Group Name, Description or Assigned Roles. For
ExternalGroups you can only edit the assigned Roles.
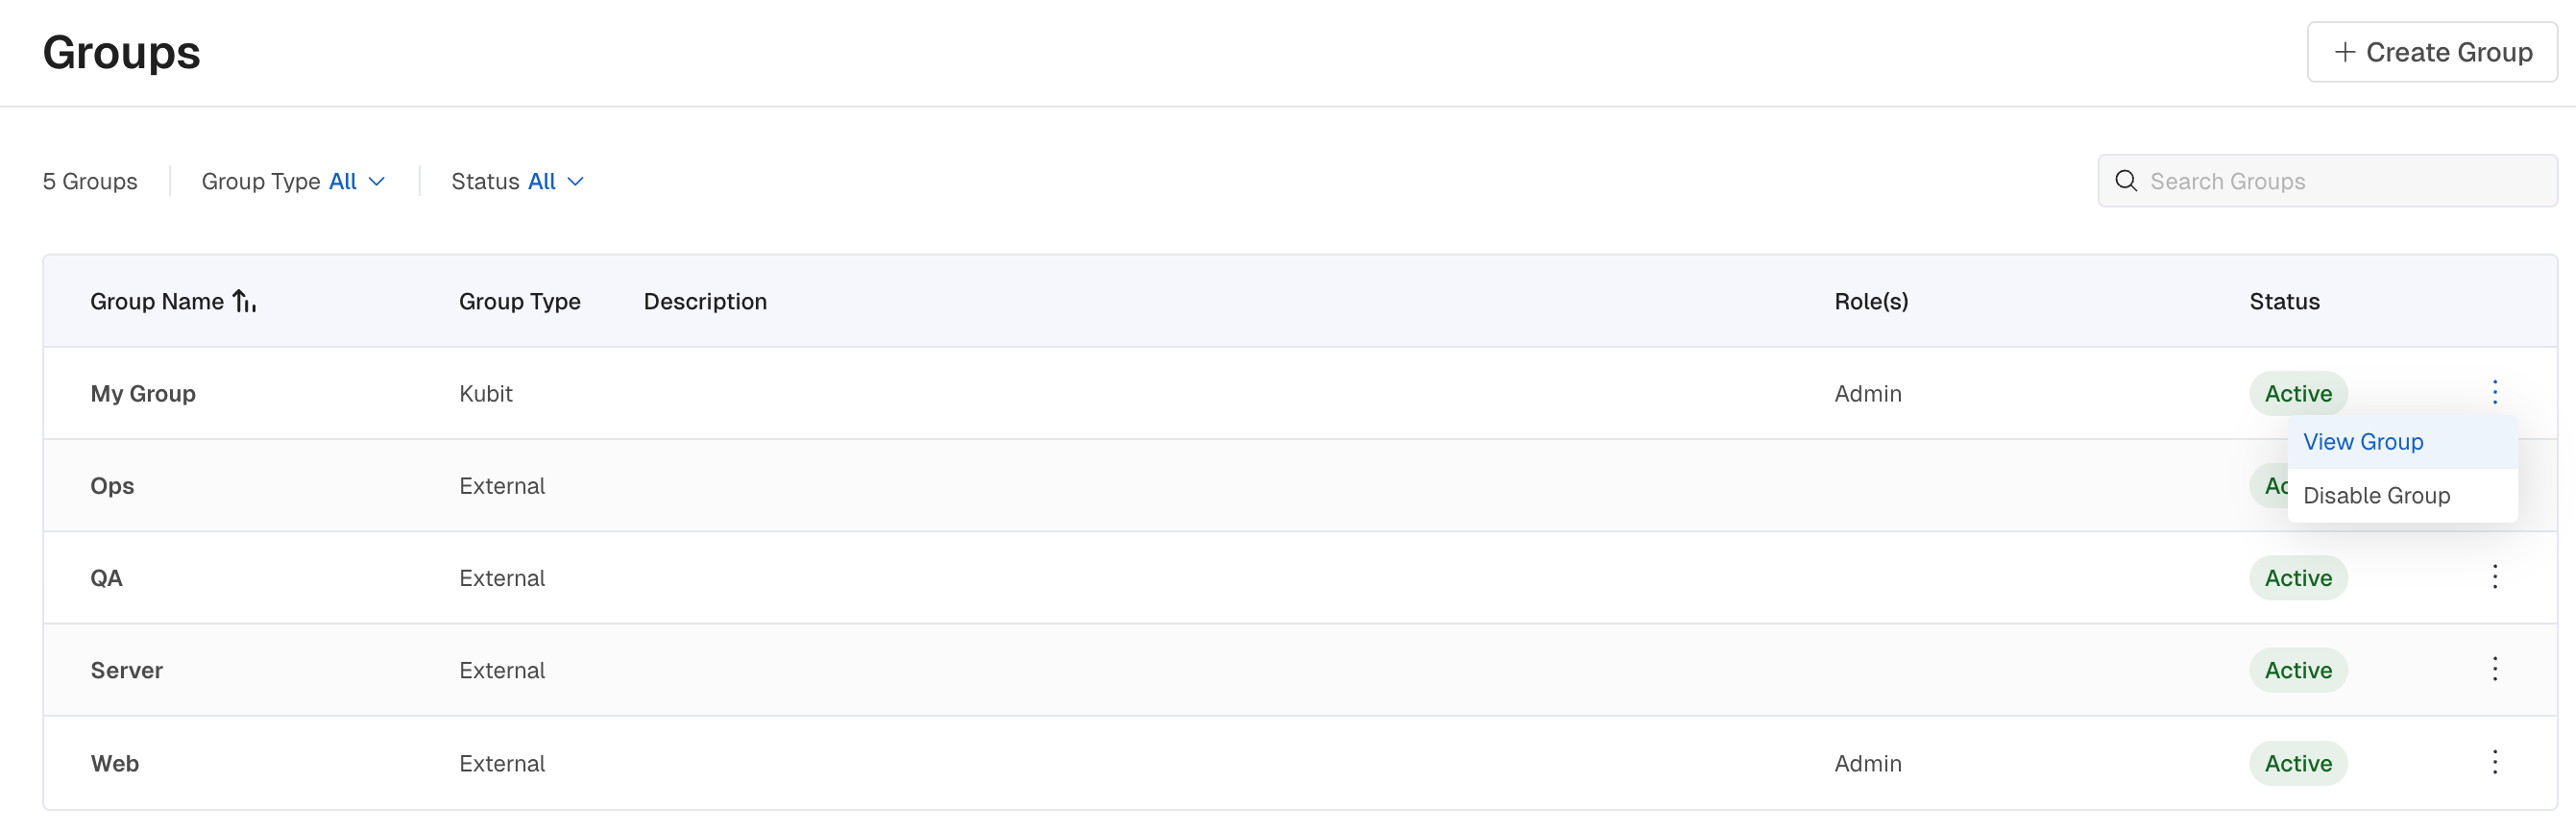
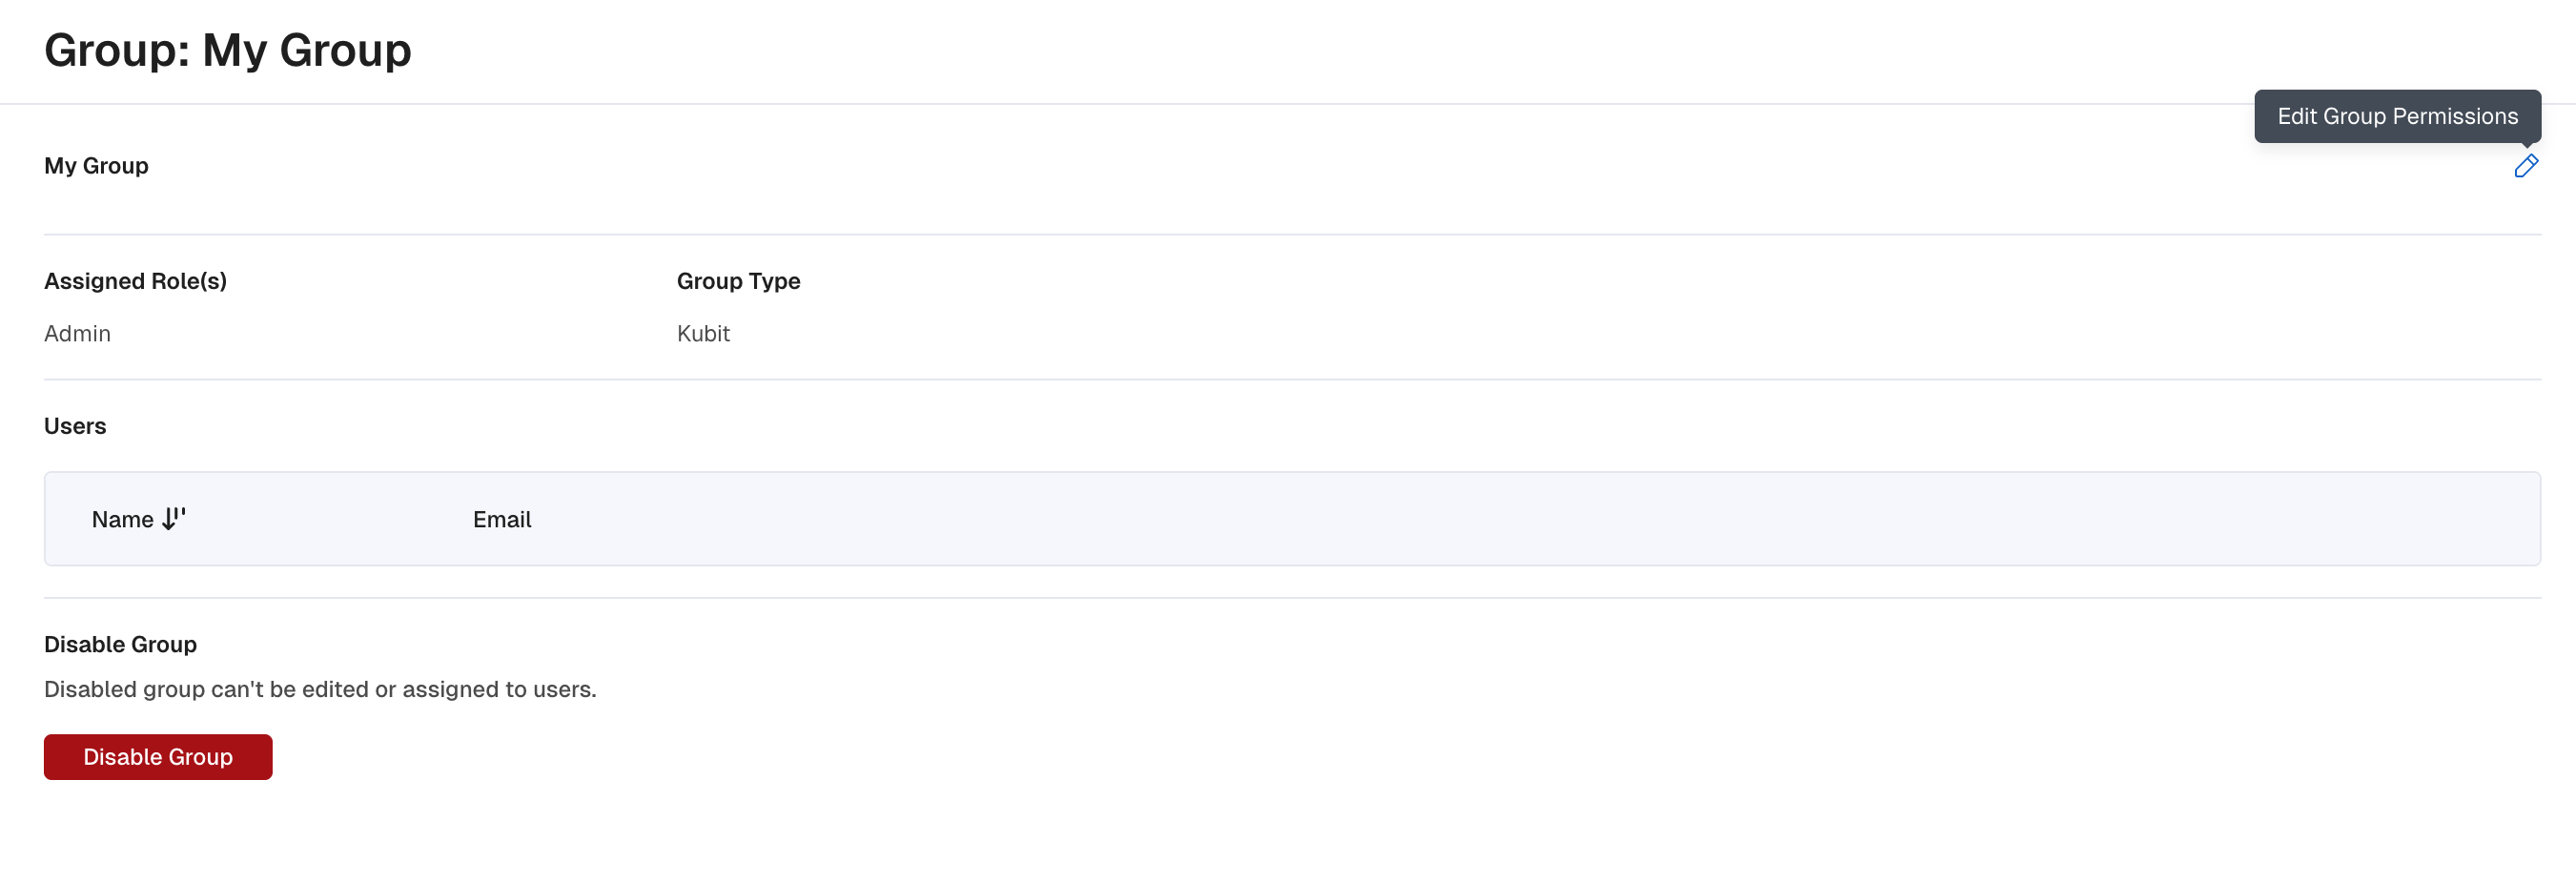
Disable a Group
If you've created a Group and no longer need it you'll follow these two steps:
- Remove all Users from the Group so their access is not disrupted.
- Disable the Group by clicking the 3 vertical dots to the right of the Group Name.
You can't disable
Externalgroups.
Updated 5 months ago