Okta
Set up SSO with Okta
Requirements
- Your organization uses Okta for authentication.
- You have an Admin role.
Just-in-Time (JIT) Provision
With SAML integration, once a user is created on your end (optionally included in a group that has access to Kubit), that user can log in to Kubit immediately. The user profile information will also be automatically updated at every login time.
When a user is deleted/deactivated on your end, they will lose access to Kubit immediately too. There is no offline communication required.
Configure SAML application
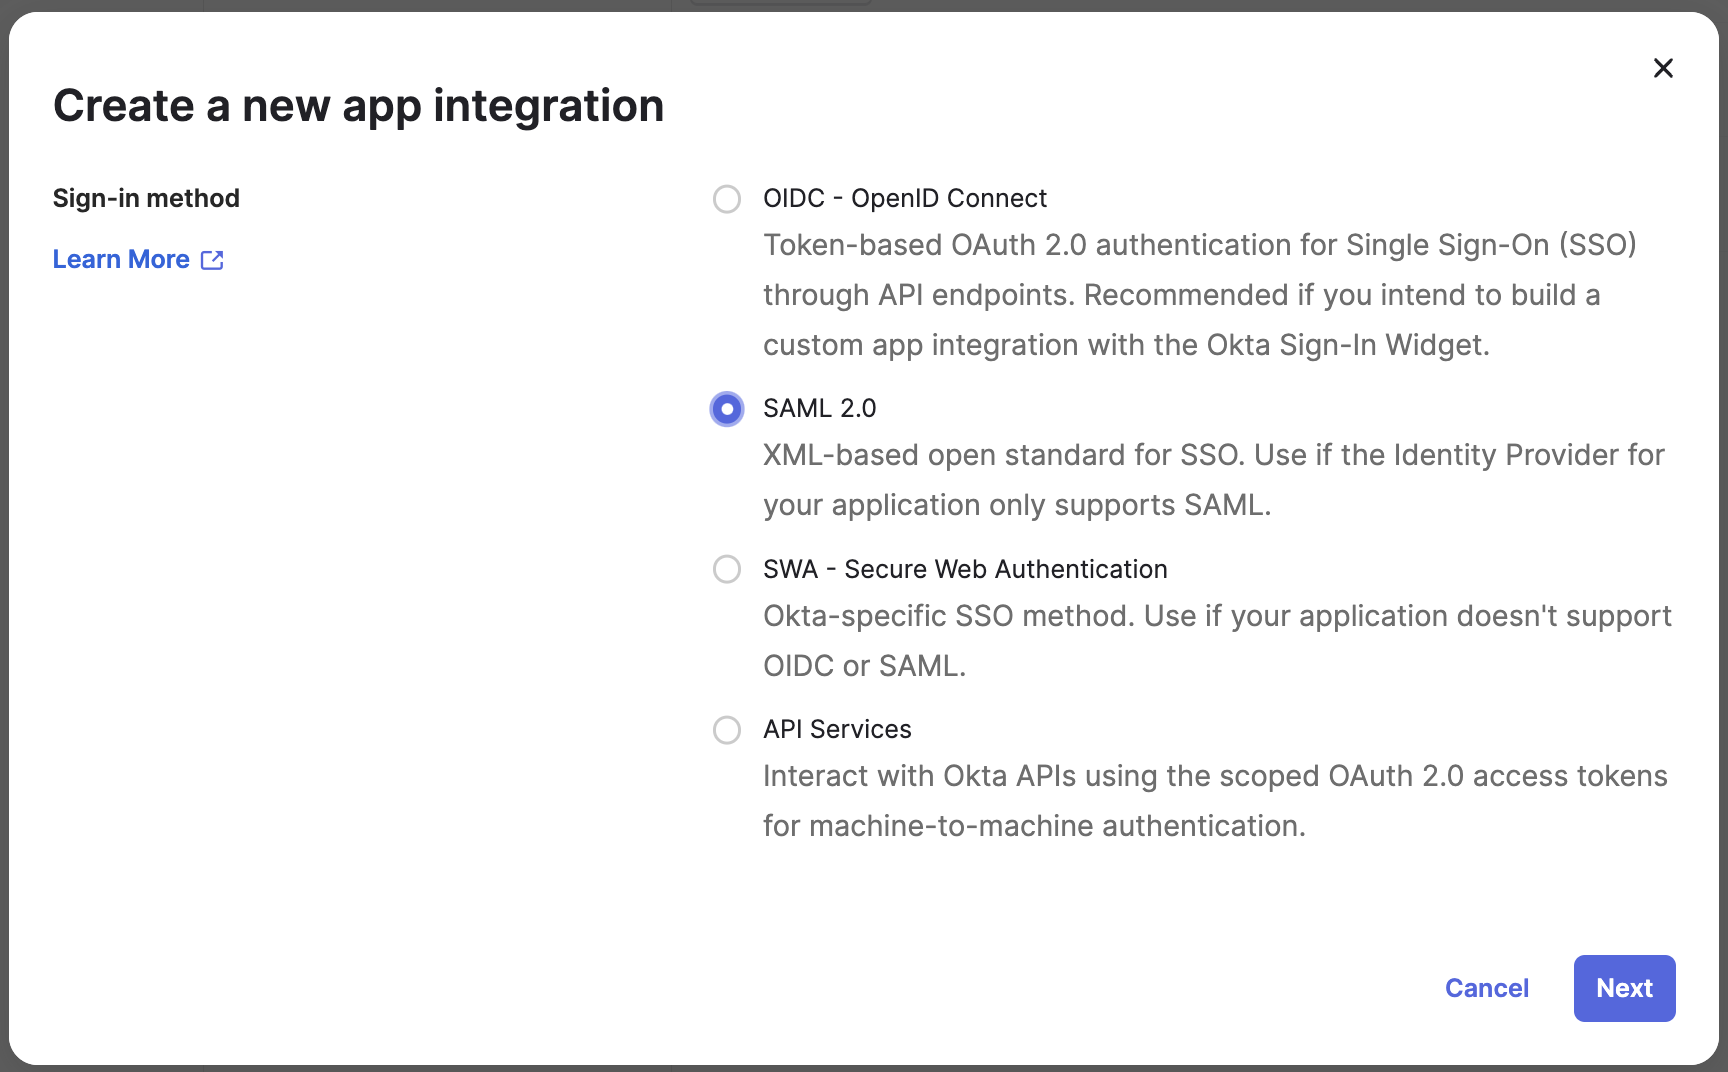
1. Create a SAML application
-
Navigate to the Okta admin portal.
-
Click on Applications under the Applications tab.
-
On the Applications screen click on Create App Integration button.
-
On the Create a new app integration screen select SAML 2.0.
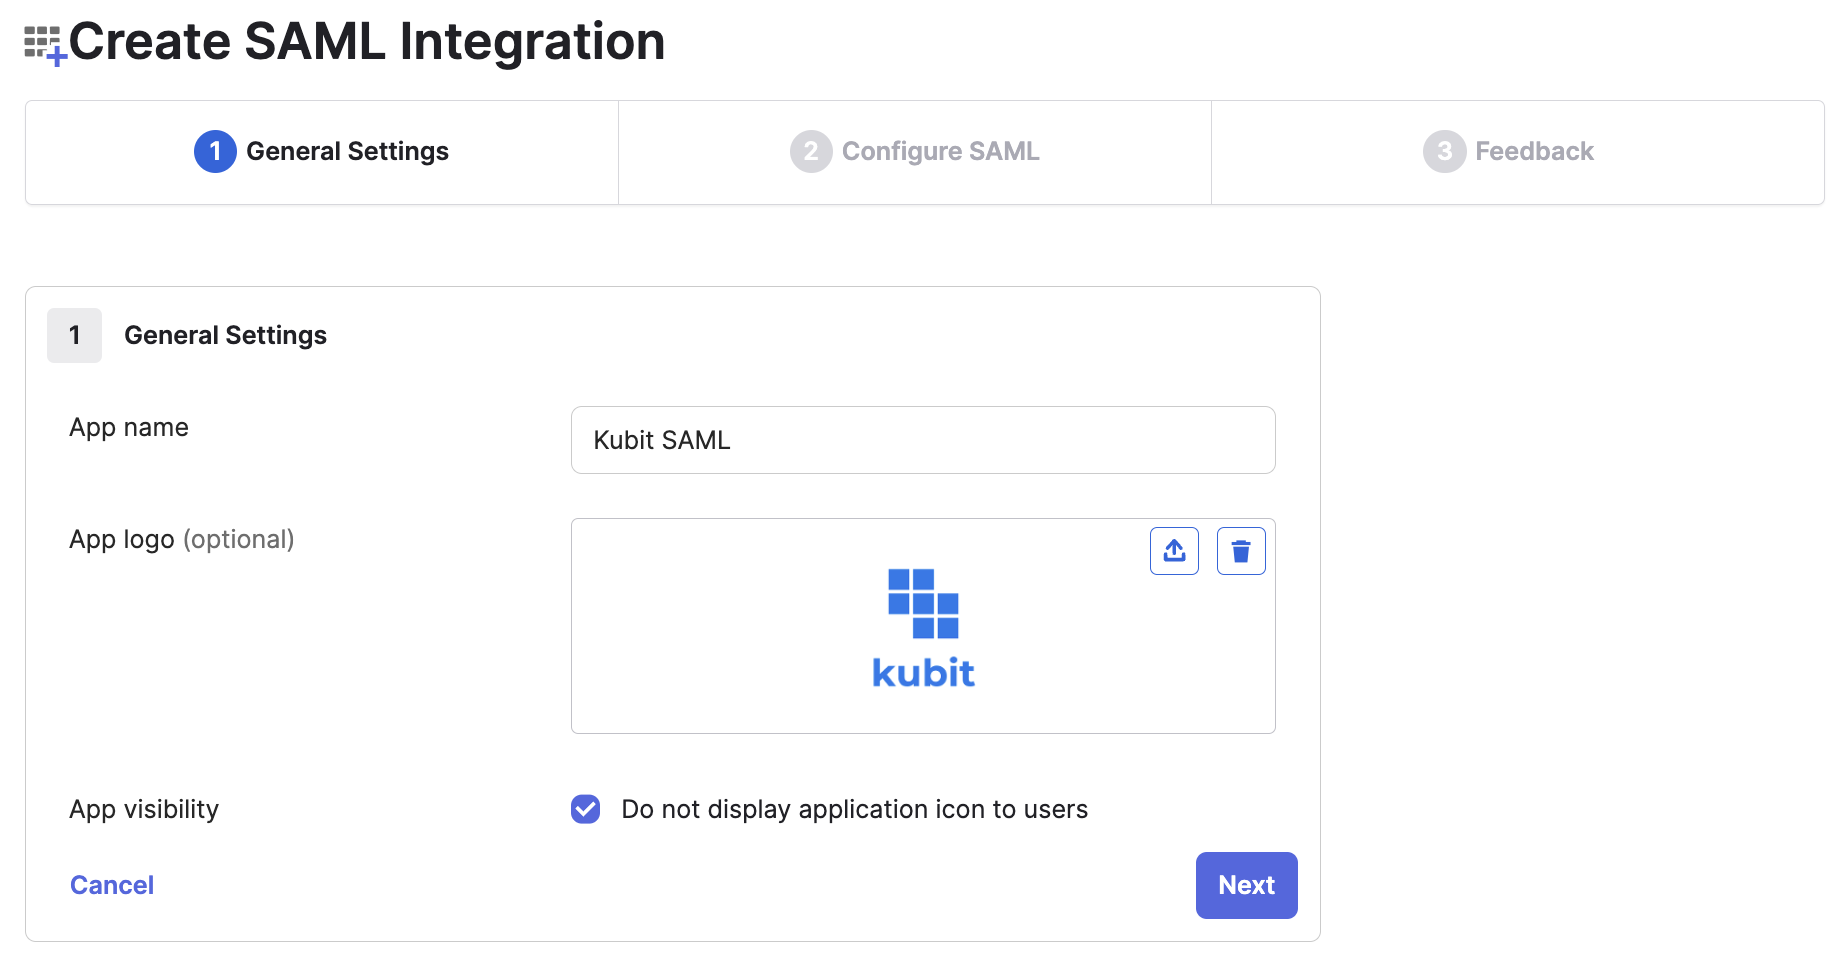
2. Configure app details
- On the step 1. General Settings use
Kubit SAMLas App name. - Download the Kubit logo from the provided Logo URL and upload it as App logo.
Check the Do not display application icon to users.
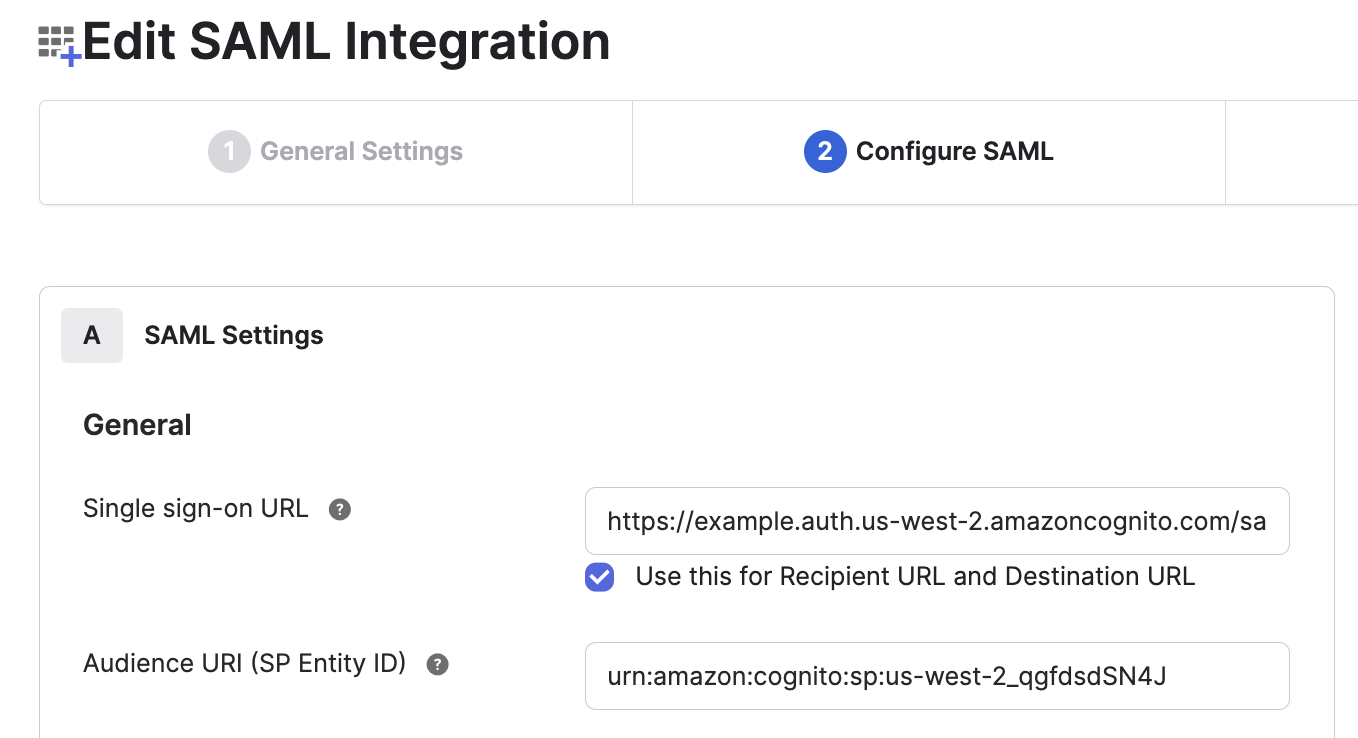
- On the next step 2. Configure SAML use the provided ACS URL as Single sign-on URL and Entity ID as Audience URI (SP Entity ID).
3. Attributes mapping
-
On the same screen map Attribute Statements as follows:
Name Value email user.email name String.join(" ", user.firstName, user.lastName)given_name user.firstName family_name user.lastName picture user.profileUrl 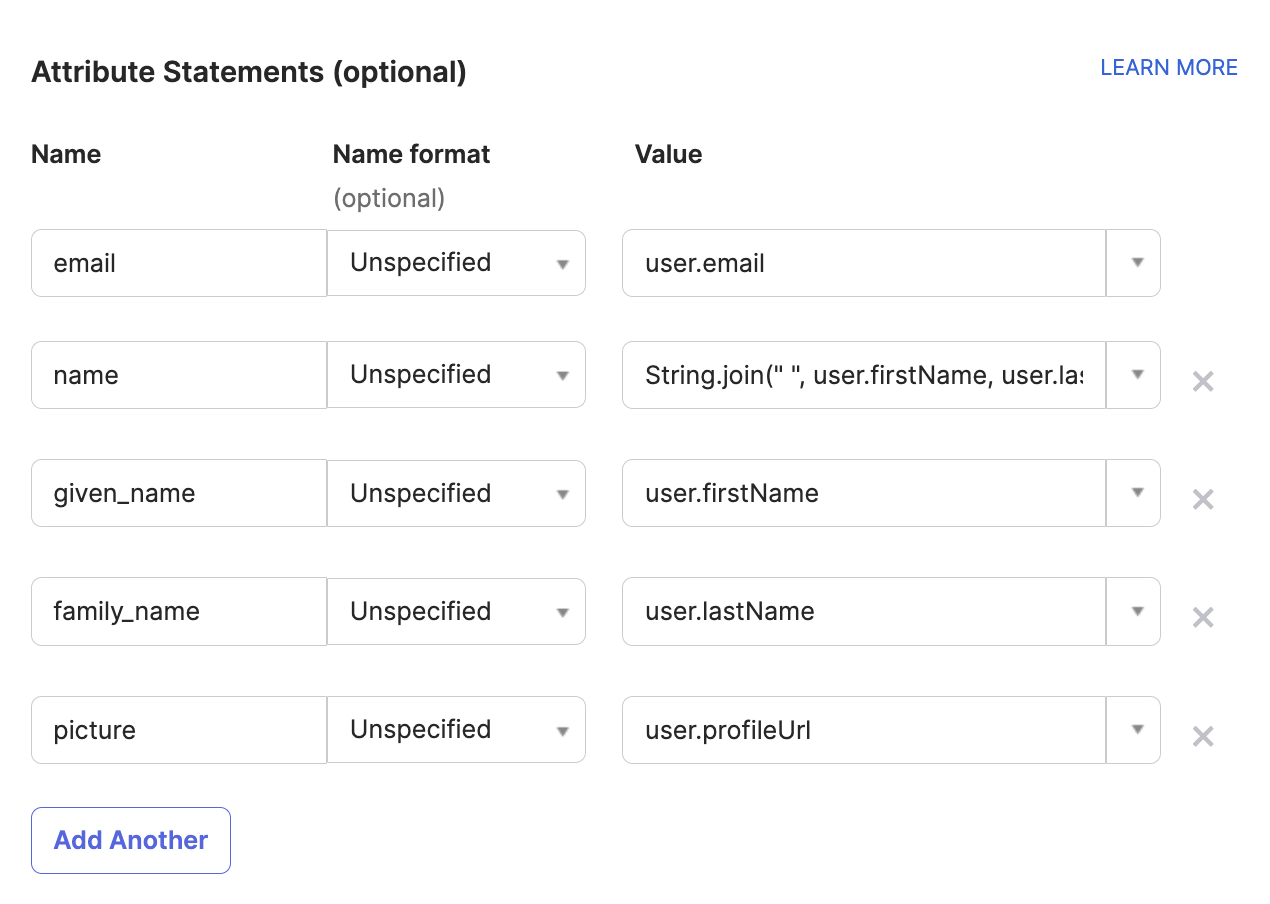
-
(Optional) On the same screen map Group Attribute Statements as follows:
| Name | Filter |
|---|---|
| groups | Matches regex: (group1\ |
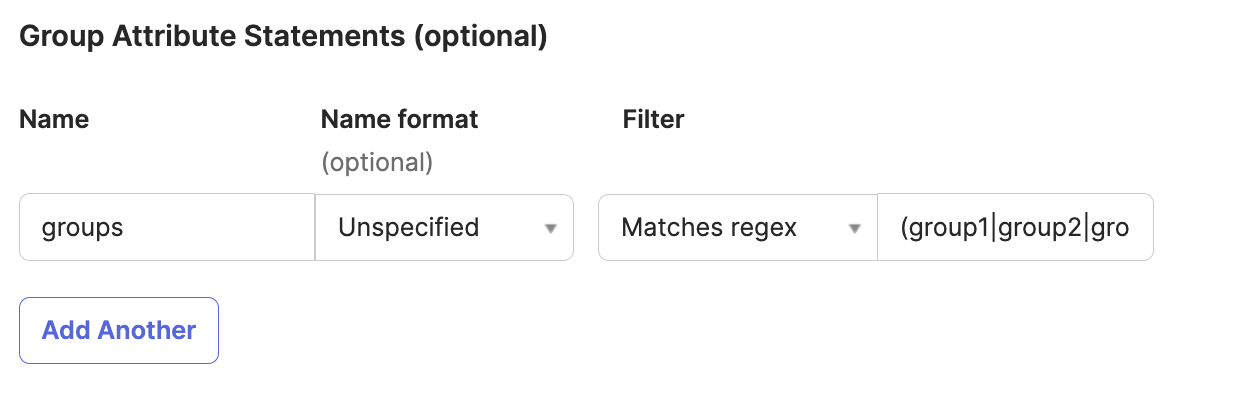
Roles and PermissionsYou can manage permissions on the Kubit platform using your IdP groups by mapping the
groupsattribute. This step is mandatory for utilizing groups for permission management within the Kubit platform.
- You can skip the next screen 3. Feedback.
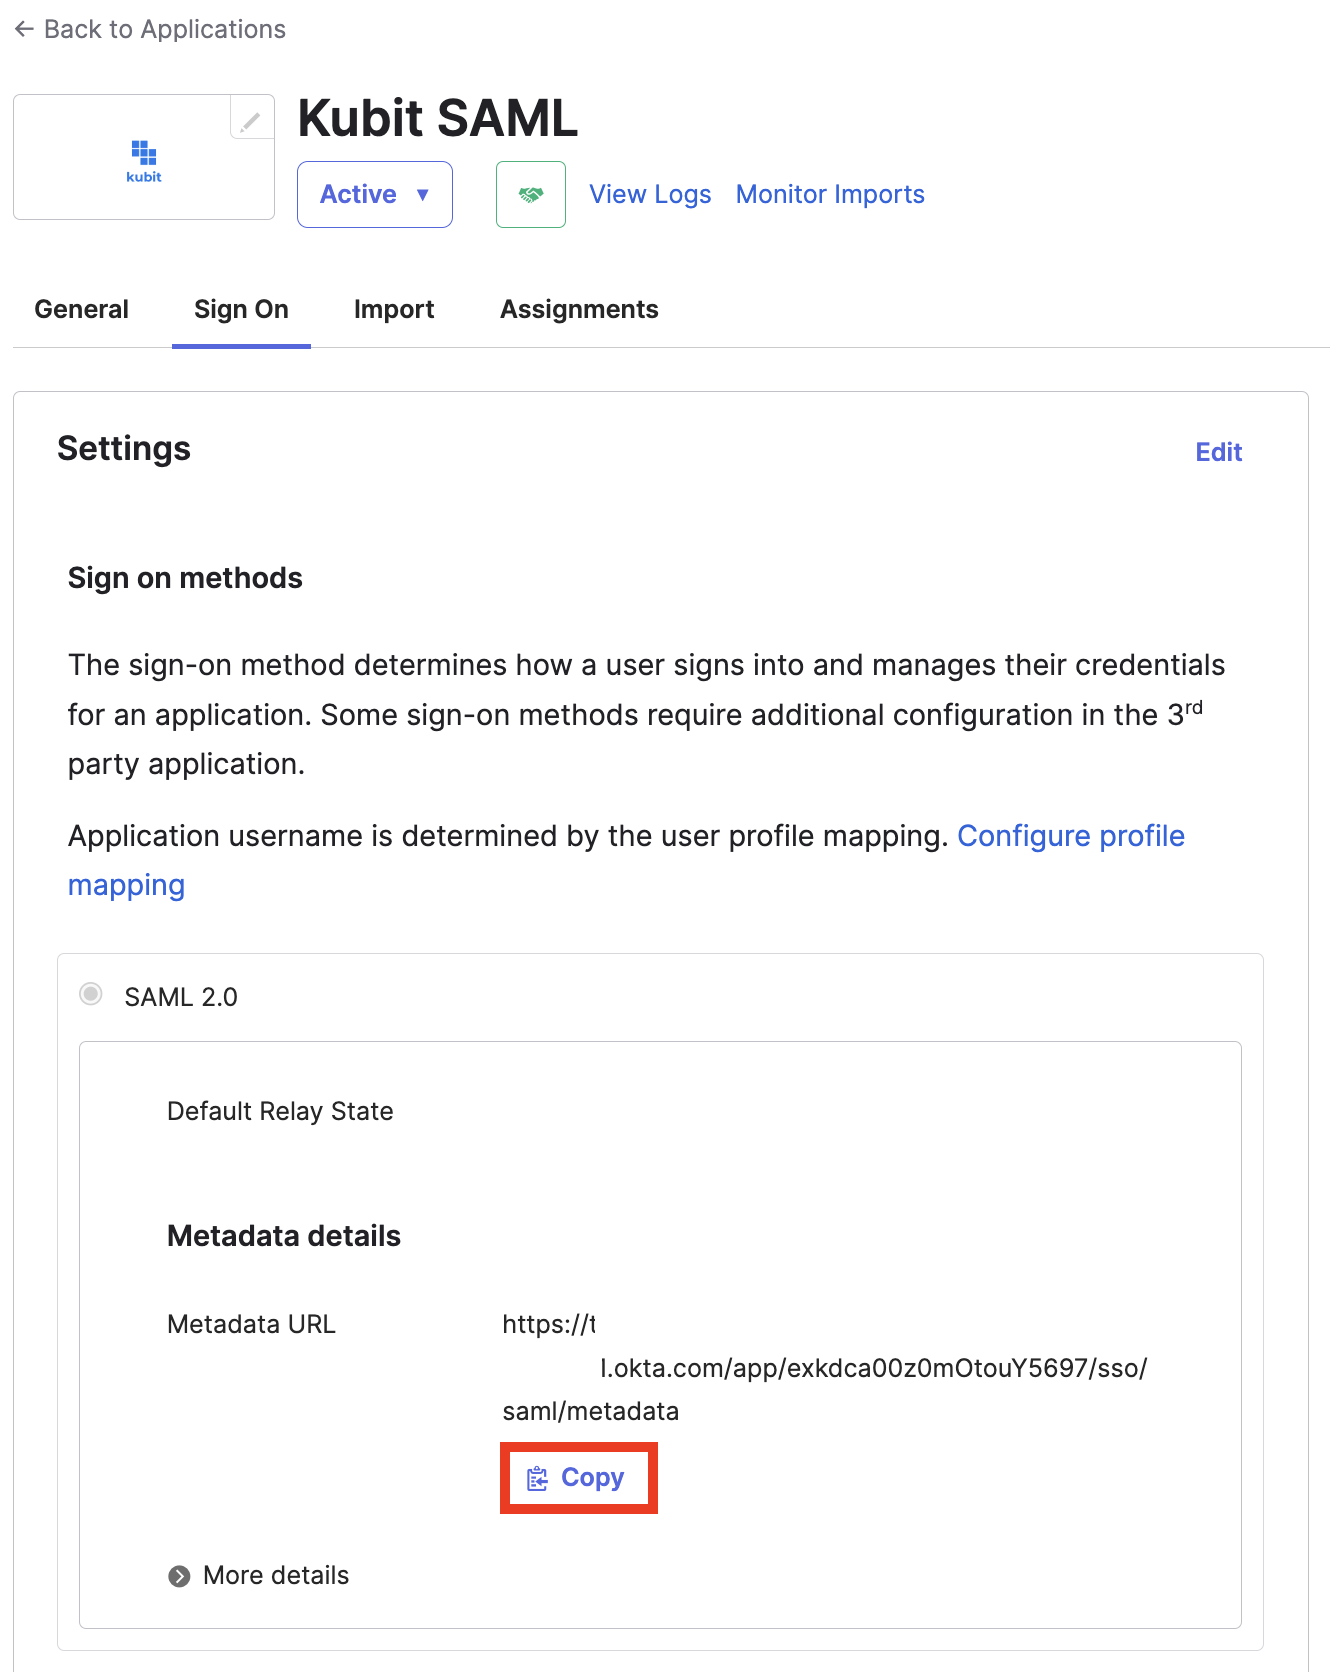
4. Share metadata URL with Kubit
Once the app is created copy the Metadata URL and share it with Kubit Team.
5. Create Bookmark app
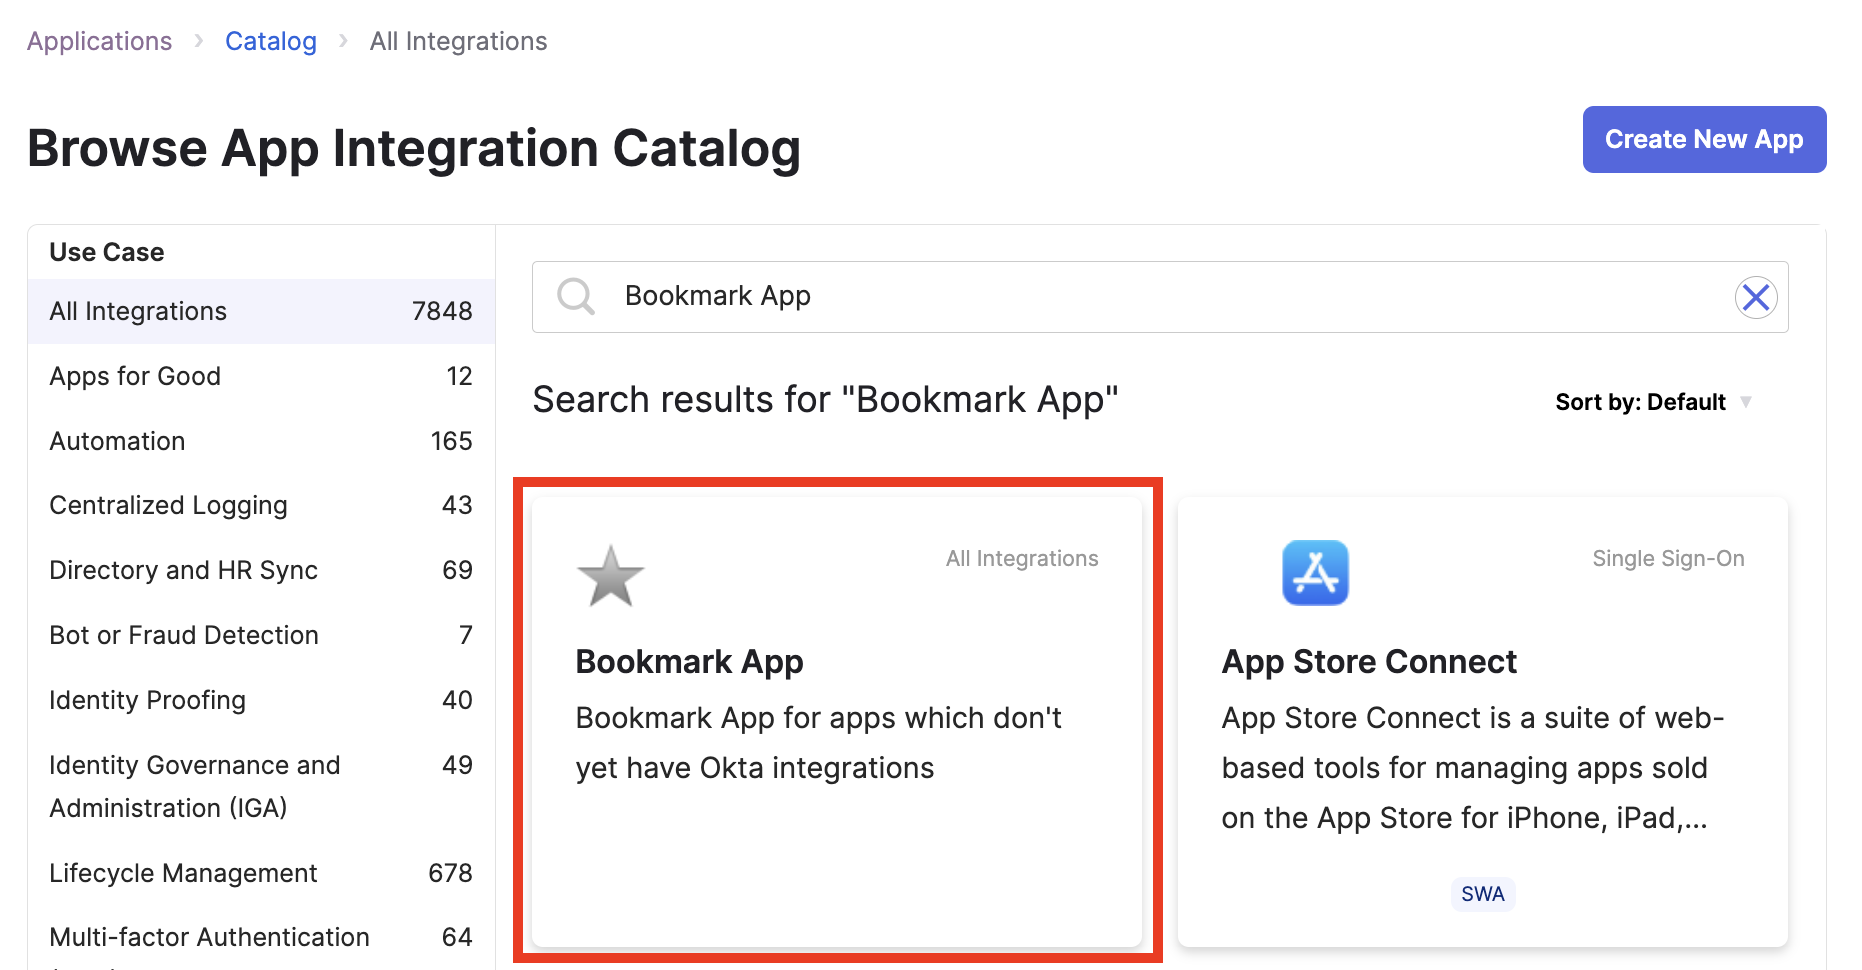
Navigate back to the Applications screen.
- Click on Browse App Catalog and search for
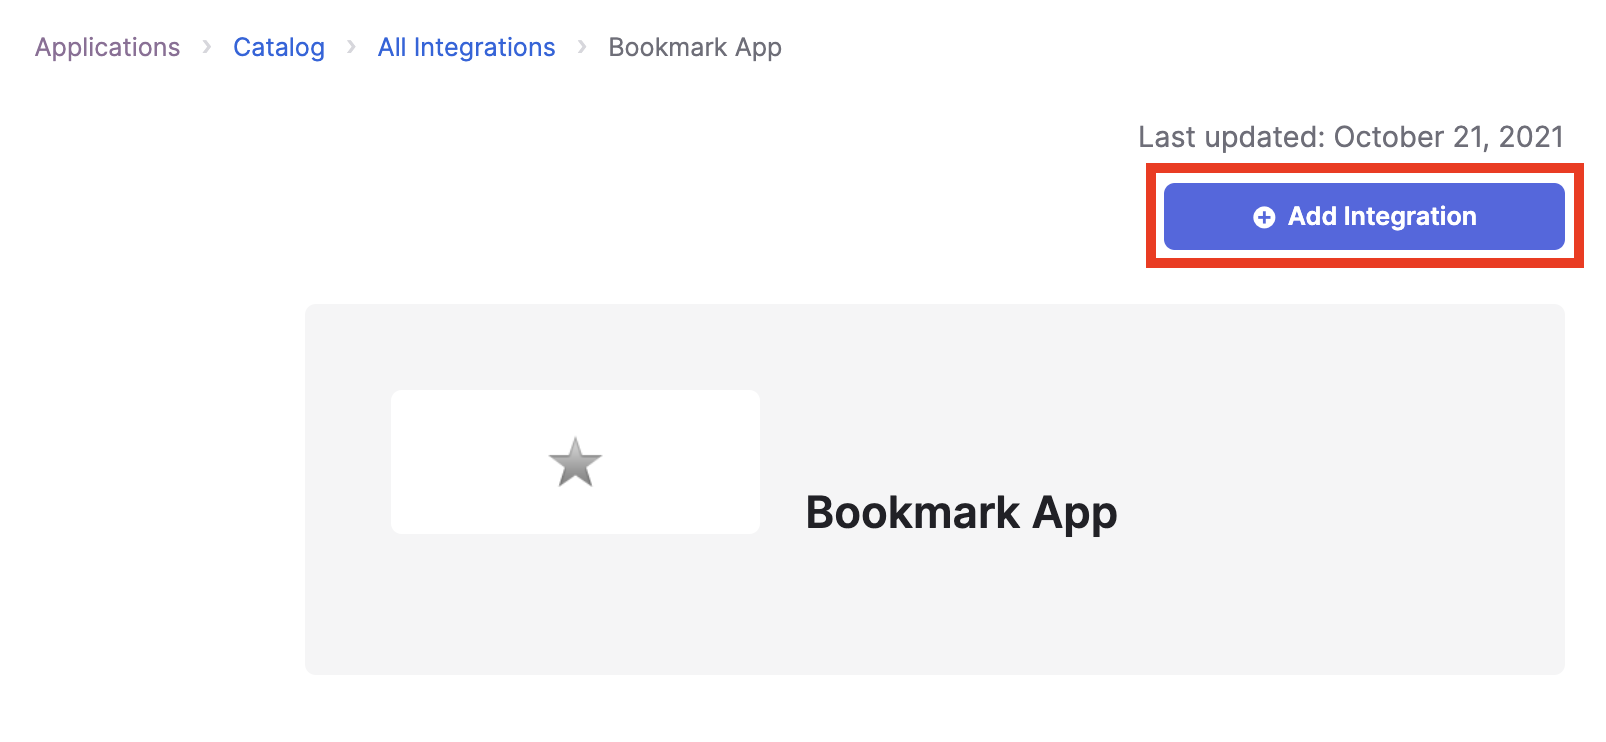
Bookmark App. While on the Bookmark App page click on + Add Integration button.
- On the Add Bookmark App screen use
Kubitas Application label. Use the provided Login URL as URL. Leave Do not display application icon to users unchecked.
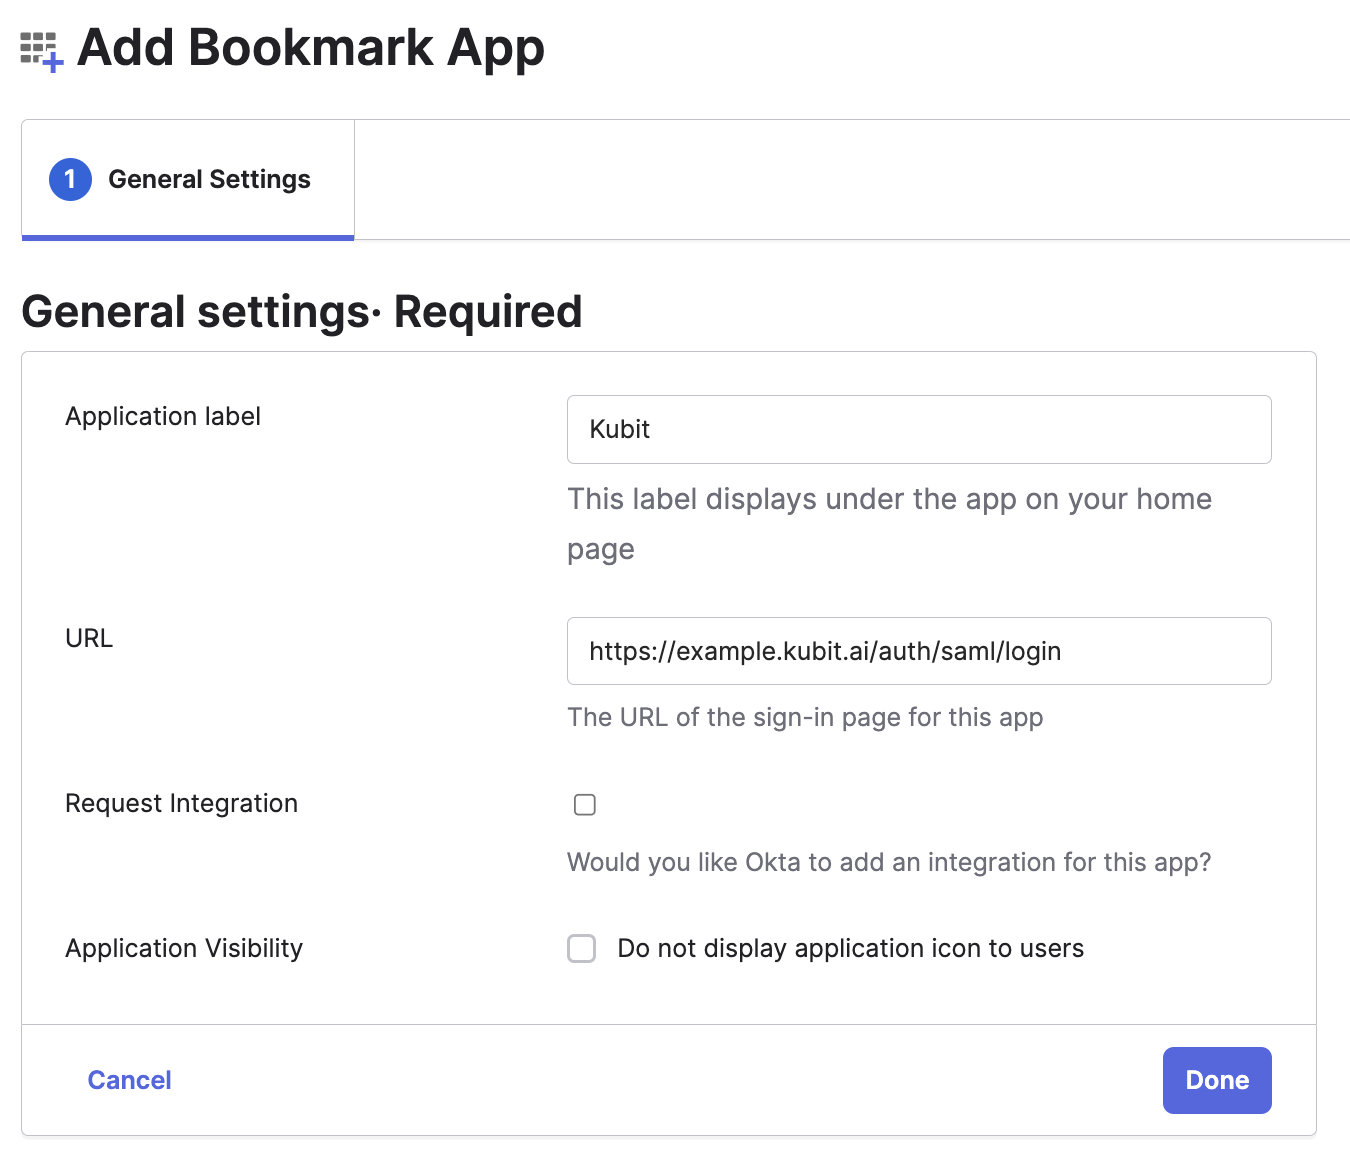
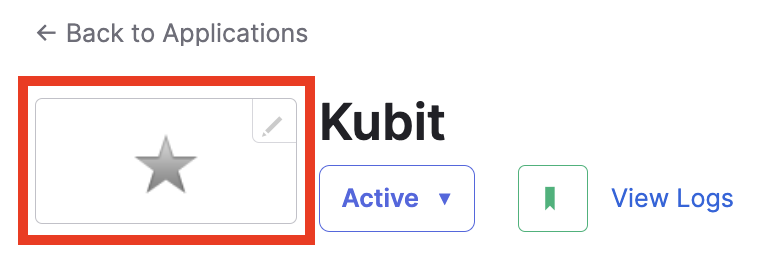
- Once the Bookmark App is created download the Kubit logo from the provided Logo URL and upload it.
6. Test
Once configured properly on both sides, please work with the Kubit Team to test the integration. You will be provided a test URL.
7. Open Access
AssignmentsMake sure to assign groups to both Kubit SAML and Kubit apps.
Assign Kubit App to specific users
Reference
Updated 5 months ago