Google OAuth
SSO with G-Suite
Introduction
By integrating Google OAuth with Kubit’s Self-Service Analytics, every user in your organization can sign in to Kubit using their Google G-Suite credential. This Single Sign-On approach eliminates yet another set of username/password to be remembered, simplify user management, and also can improve security through G-Suite's Multi-Factor Authentication.
Requirements
- Your organization uses Google G-Suite.
- You have Admin role in G-suite.
JIT Provision
With SAML integration, once a user is created on your end (optionally included in a Security Group which has access to Kubit), that user can login to Kubit immediately. The user profile information will also be automatically updated at every login time.
When a user is deleted/deactivated on your end, they will lose access to Kubit immediately too. There is no offline communication required.
Configure Google OAuth
Step 1
- Go to Google API Console
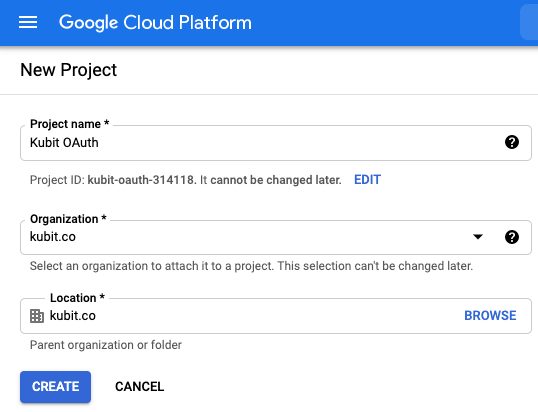
- Choose an existing project or create a new project, call it "Kubit OAuth". Make sure to select the correct target Organization and Location.
Step 2
- Switch to the newly created "Kubit OAuth" project. Click on "CONFIGURE CONSENT SCREEN"

Step 3
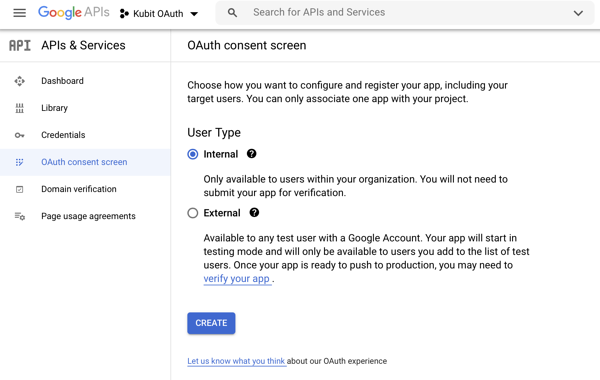
- Select "Internal" for User Type, click CREATE
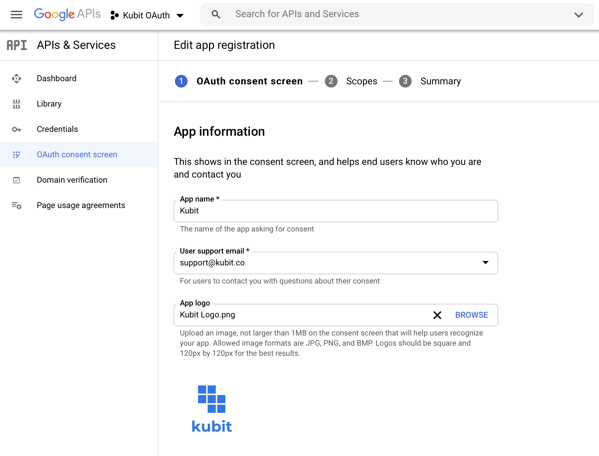
Enter the following information:
- App Information
- App name: Kubit
- User support email: select an internal email from your organization, like IT or support department.
- App Logo: please use this Kubit Logo
App Domain:
- Application home page: https://YOUR-ORG.kubit.ai (provided by Kubit)
- Application privacy policy link: https://www.kubit.ai/privacy-policy
- Application terms of service link: https://www.kubit.ai/terms-of-service
- Authorized domains: kubit.ai
- Developer contact information: [email protected]
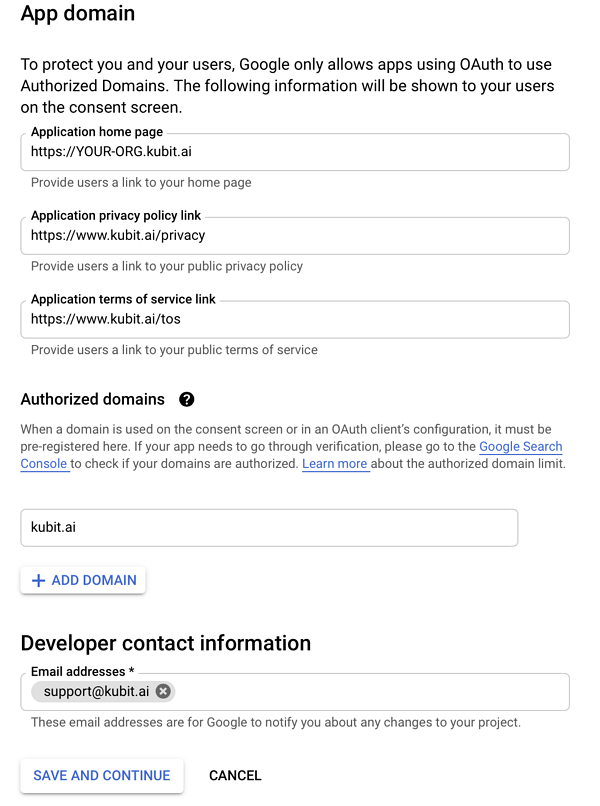
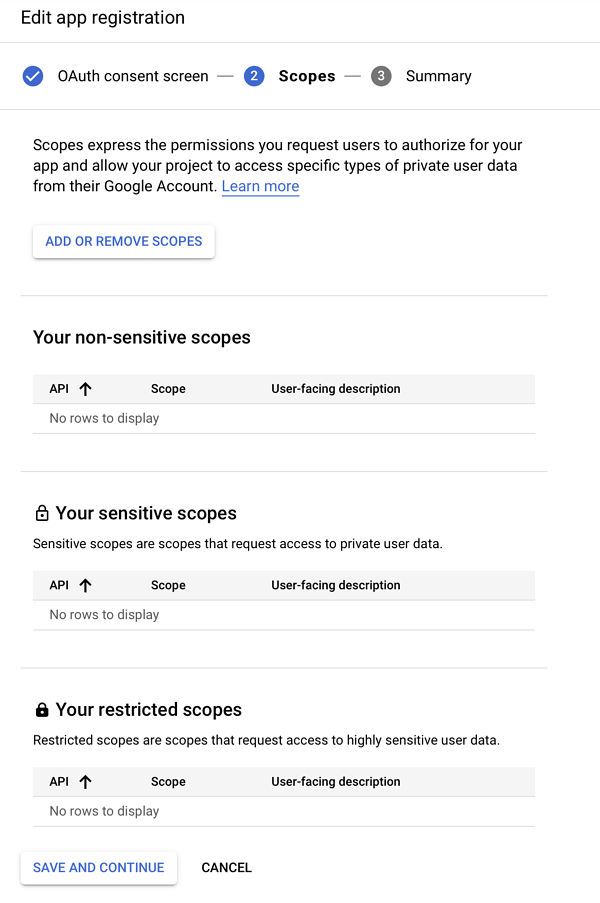
You don' t need to config any scopes. Just click "SAVE AND CONTINUE"
Step 4
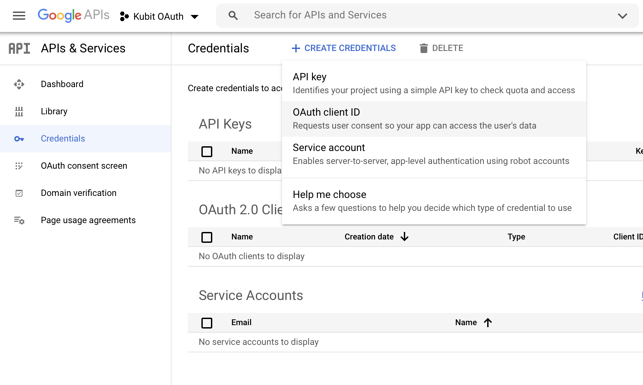
Go to Credentials, click on "CREATE CREDENTIALS", select "OAuth client ID"
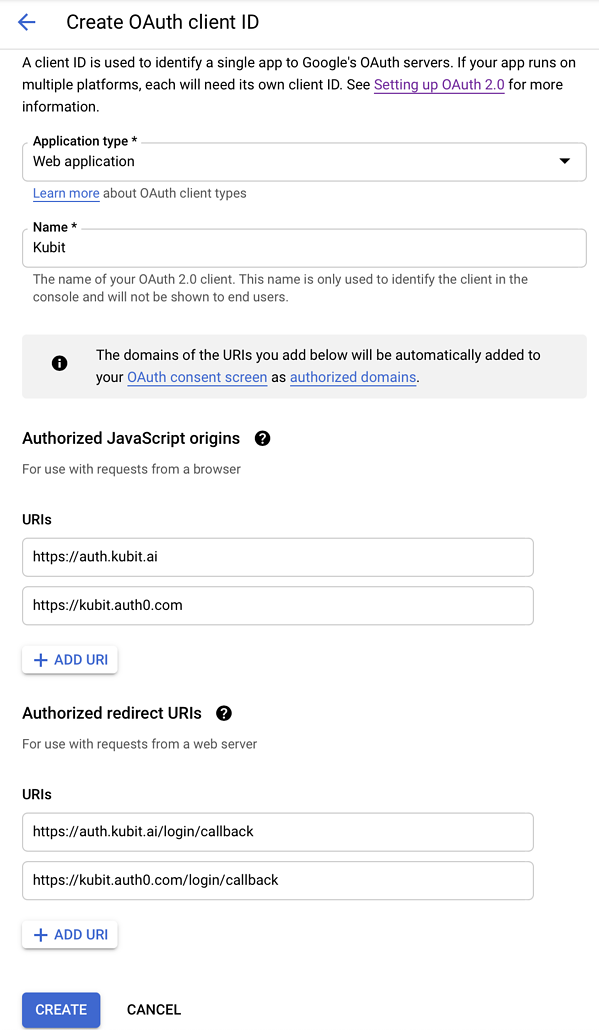
- Select Application type: "Web application"
- Name: Kubit
- Authorized Javascript origins: https://auth.kubit.ai and https://kubit.auth0.com
- Authorized redirect URIs: https://auth.kubit.ai/login/callback and https://kubit.auth0.com/login/callback
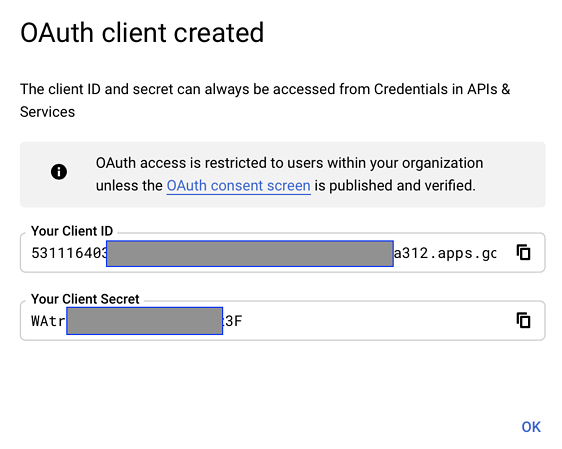
- Click CREATE. Copy "Your Client ID" and "Your Client Secret", then send them to Kubit team through a communicated secure channel (Slack, Google Hangout or Discord).
Test Integration
- Only after Kubit inform you that the configuration is completed on their part, go to https://YOUR_ORG.kubit.ai
- At the login screen, start typing in your company email address.
LoginThe password field will disappear once the full email is entered.
- Click on "LOG IN" and use your company G-Suite credential to login.
References
Updated about 1 month ago